^ Back to Home Page ^
Projects Index
o
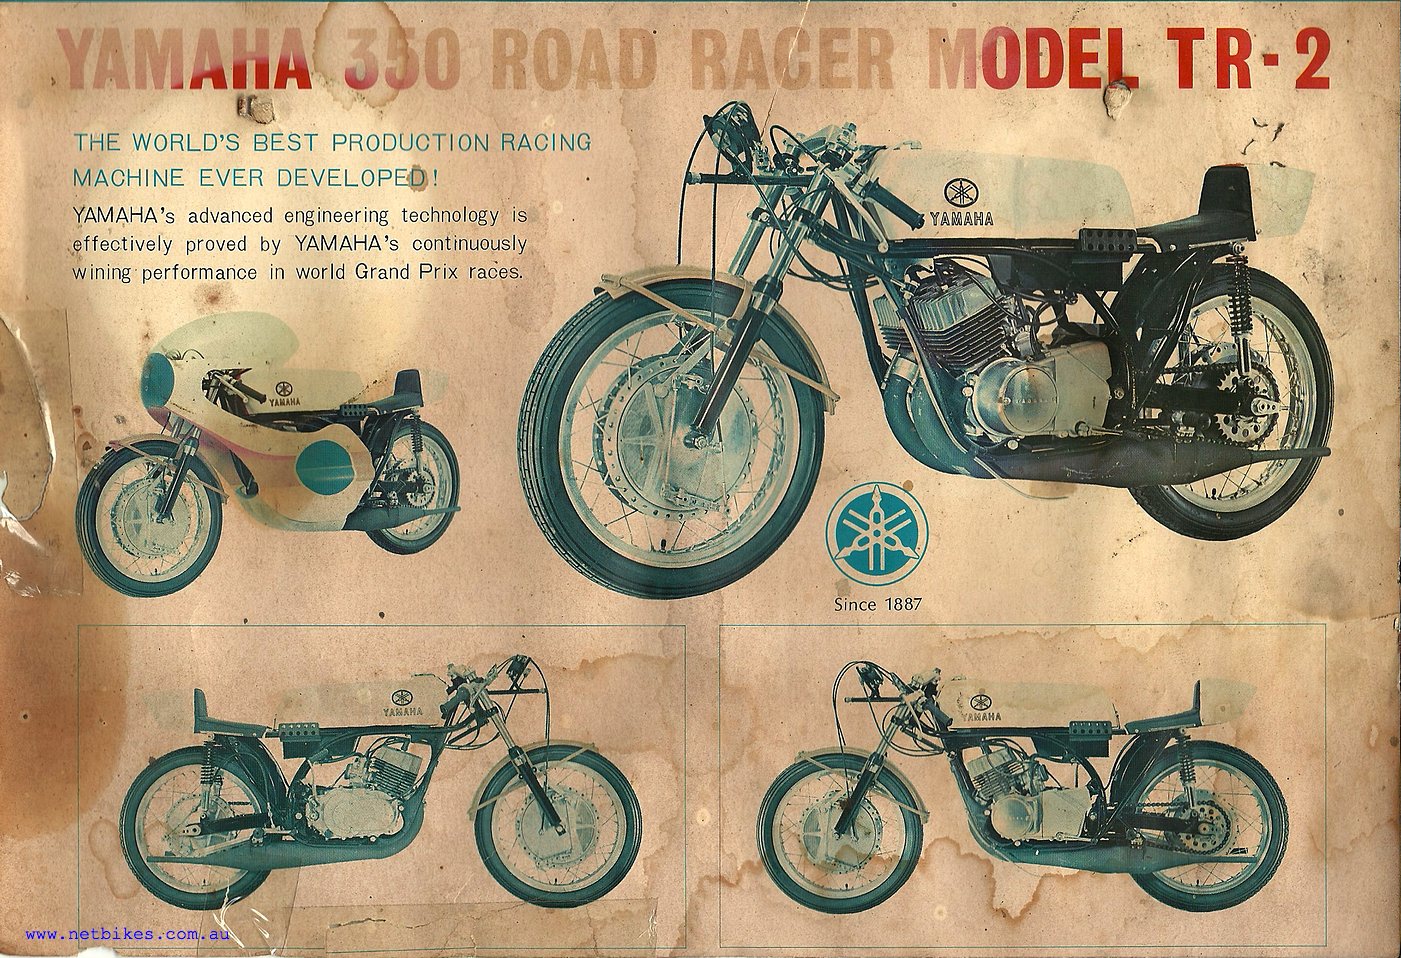
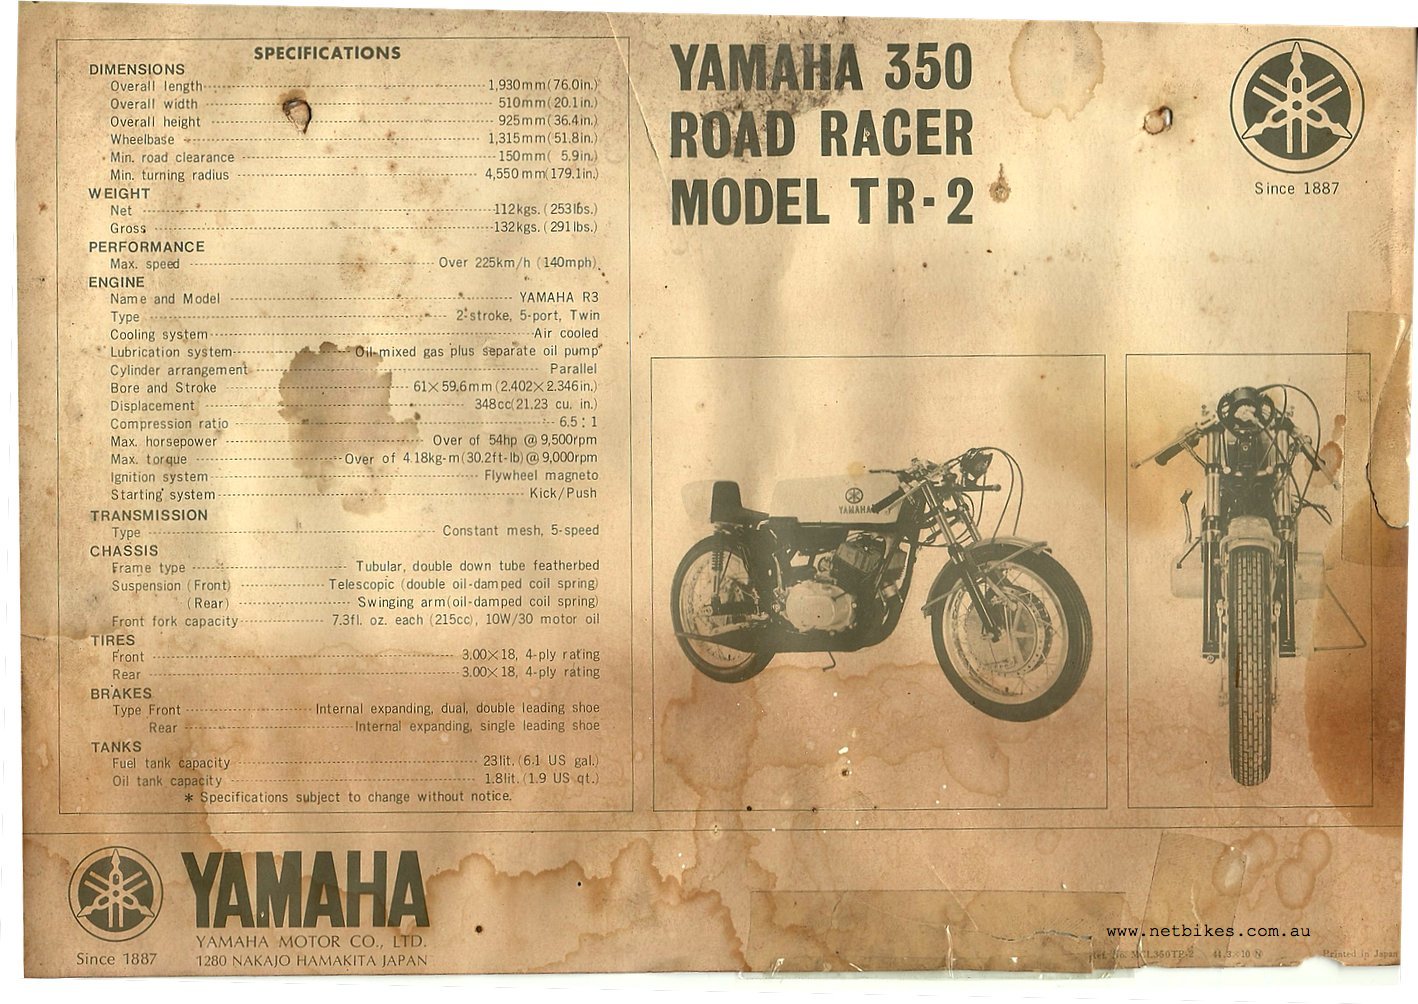
| A treasure found just today, Aug 11, on the wall at Ron Russ home business where I am having the crank rebuilt.
he said he got the brochure from Annand & Thompson Brisbane back in the day, you could buy this race bike right off the showroom floor then. If you open up the big picture and select print in Landscape it will fill the entire page, worthy to laminate and hang any garage wall. Since these pics were taken I have cleaned the "3" up a little with stainless pot scrubbers over the surface rust etc but I am not going to restore it.
|


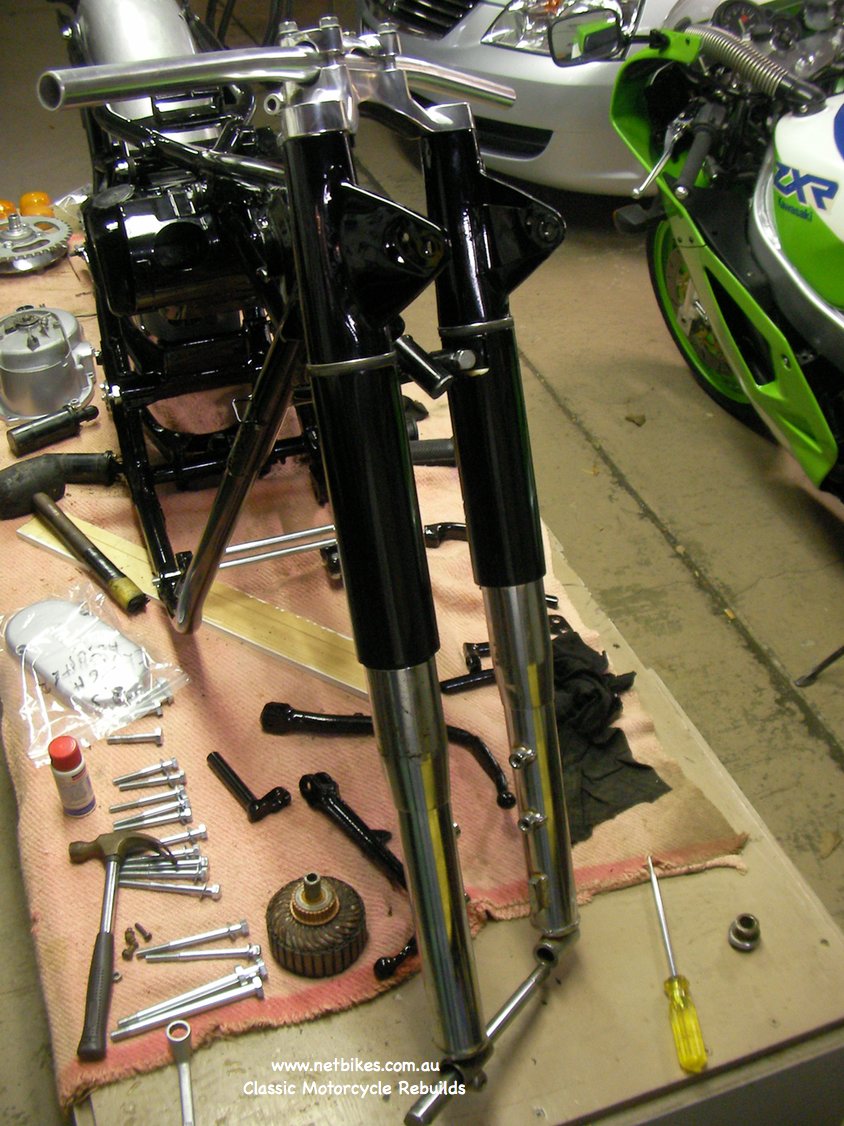
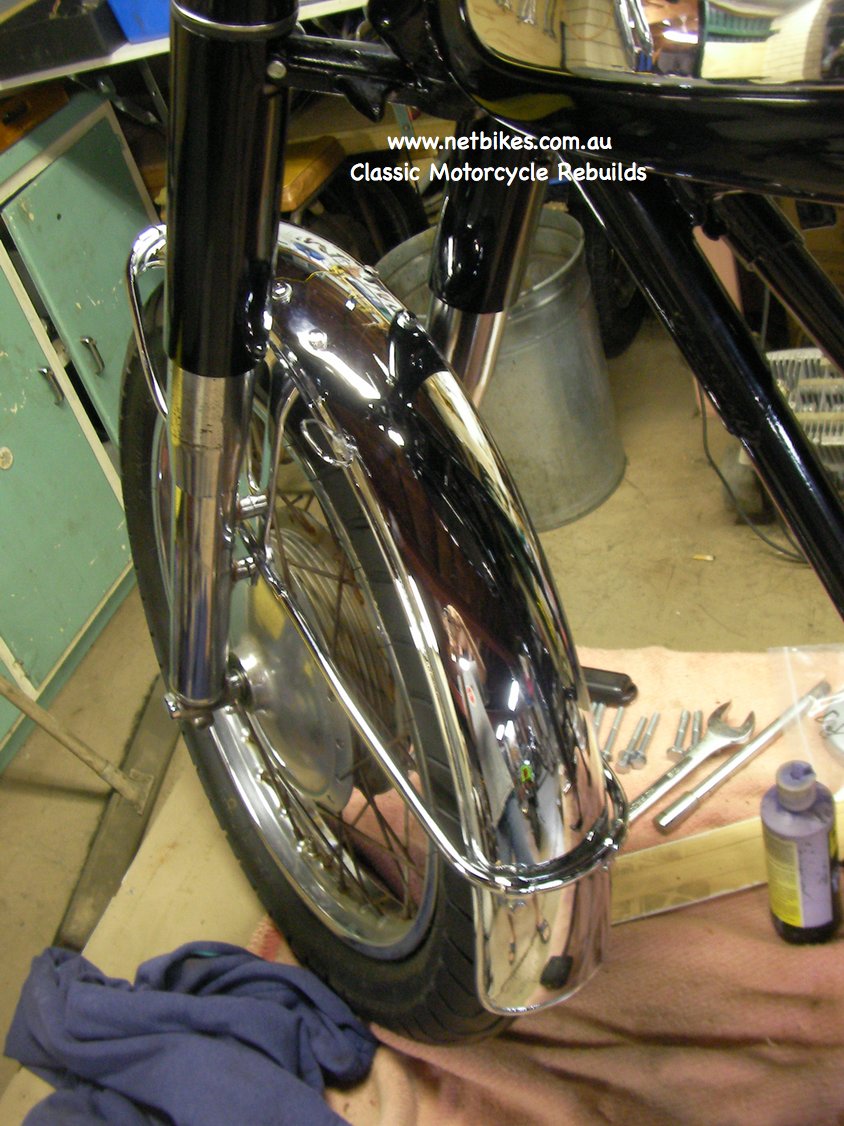
| It has now been several months since I started this page, finally decided it is time to get back on track with the 3. Below is a youtube vid I did today, I have stripped the front end from the bike today and tomorrow I will begin working on those parts. (Background music is Pink Floyd, Animals) |
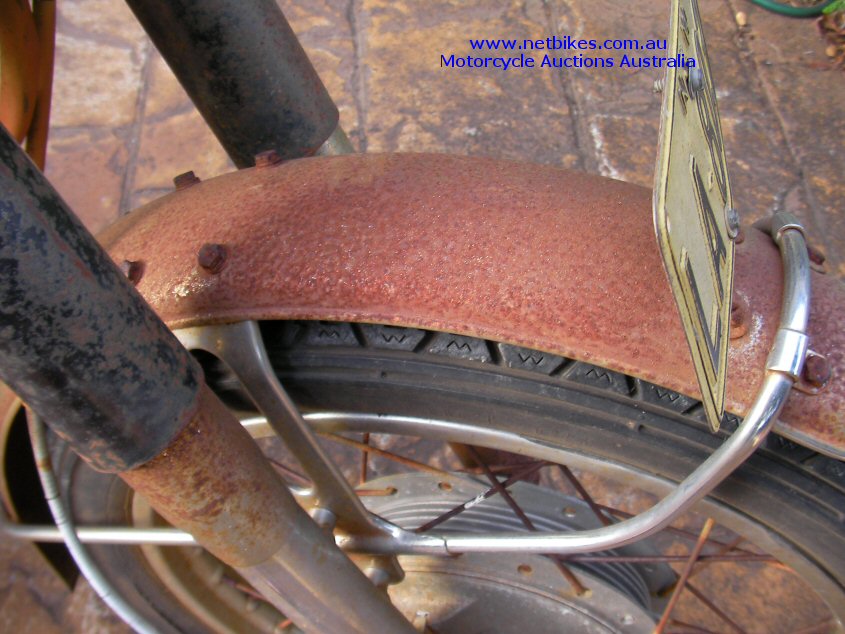
| Didn't get a real lot done today, removed the wheel bearings and fitted the new tyre, the right fork leg has a slight bend so I will take it to Rad here is bris for them to sort. I am ordering head bearings and cups from Speed and sport tonight so I expect the front will not be back on the bike for a couple of weeks. In the mean time I will just clean up and or prepare the parts I have removed for reassembly. Small movie of the disassembled parts below. (Background music in Chicago 25 or 6 2 4). |
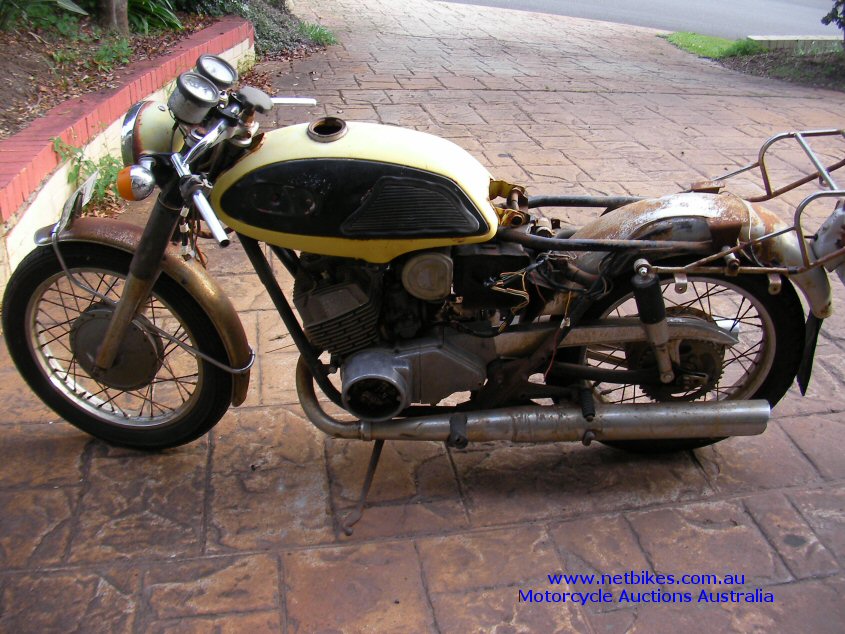
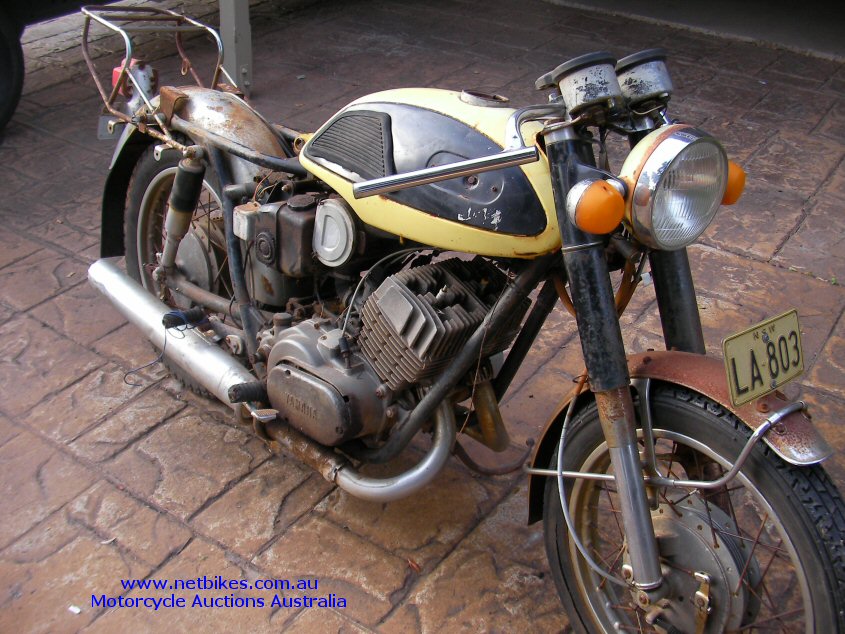
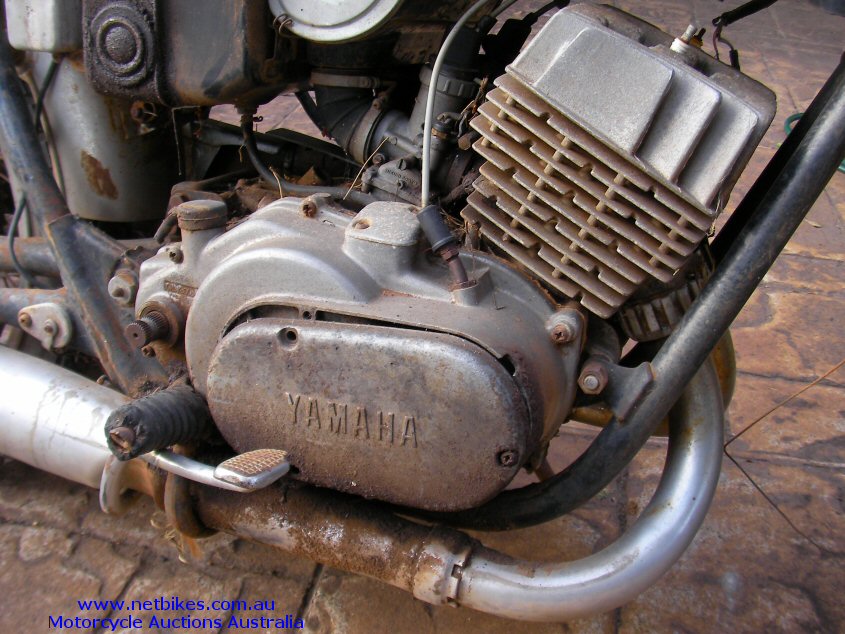
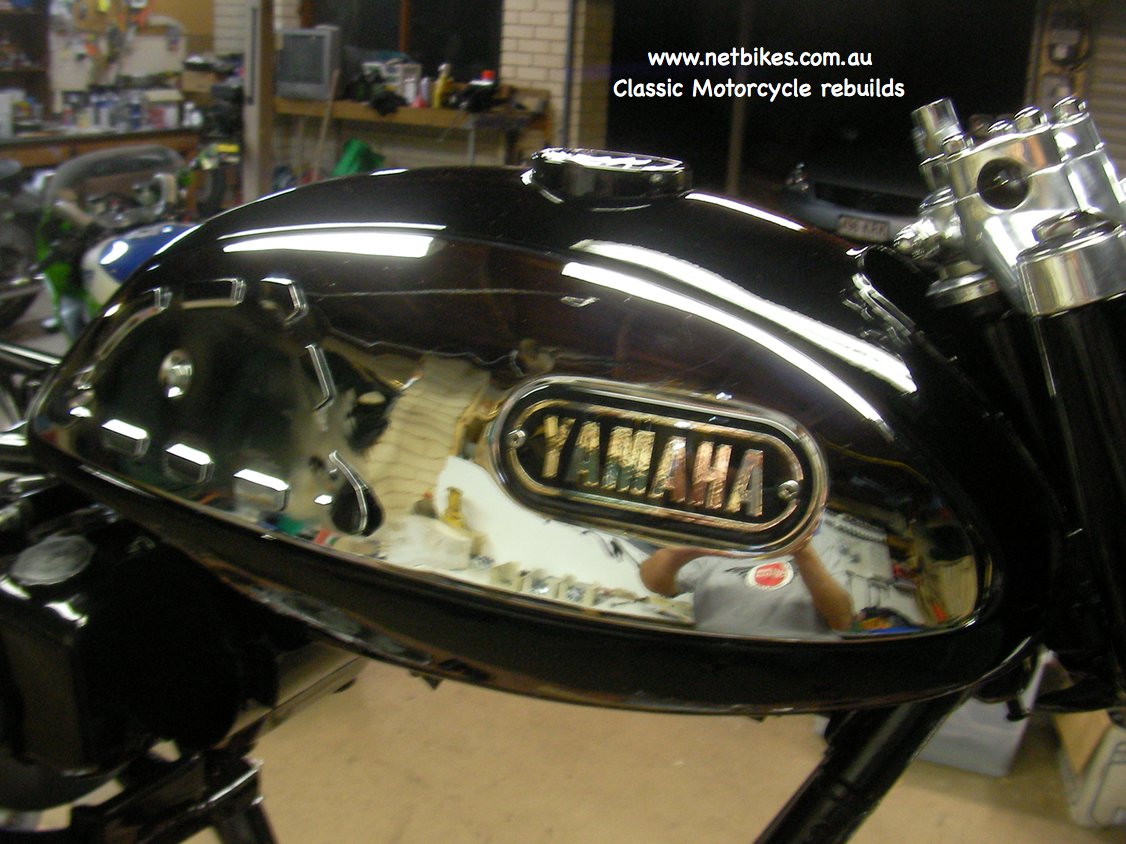
| Well the project has taken a pretty big turn about for the original intended leave it look as it is finish I had planned for it, somewhere is a previous life I found the bike had been hand painted, and I suspect it was waterbased house paint as anytime I used any sort of cleaner, even soap and a scrubber, the paint would just flake off leaving bare metal. Can't leave it like that so now everything in one way or another will be cosmetically restored. It will not be sit in the lounge unused restored but very nice and good for daily rider.
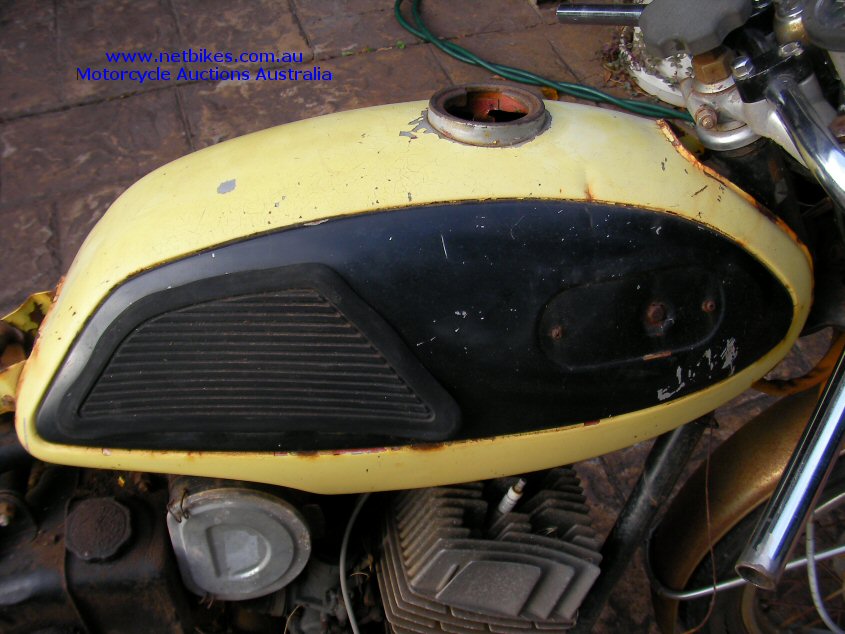
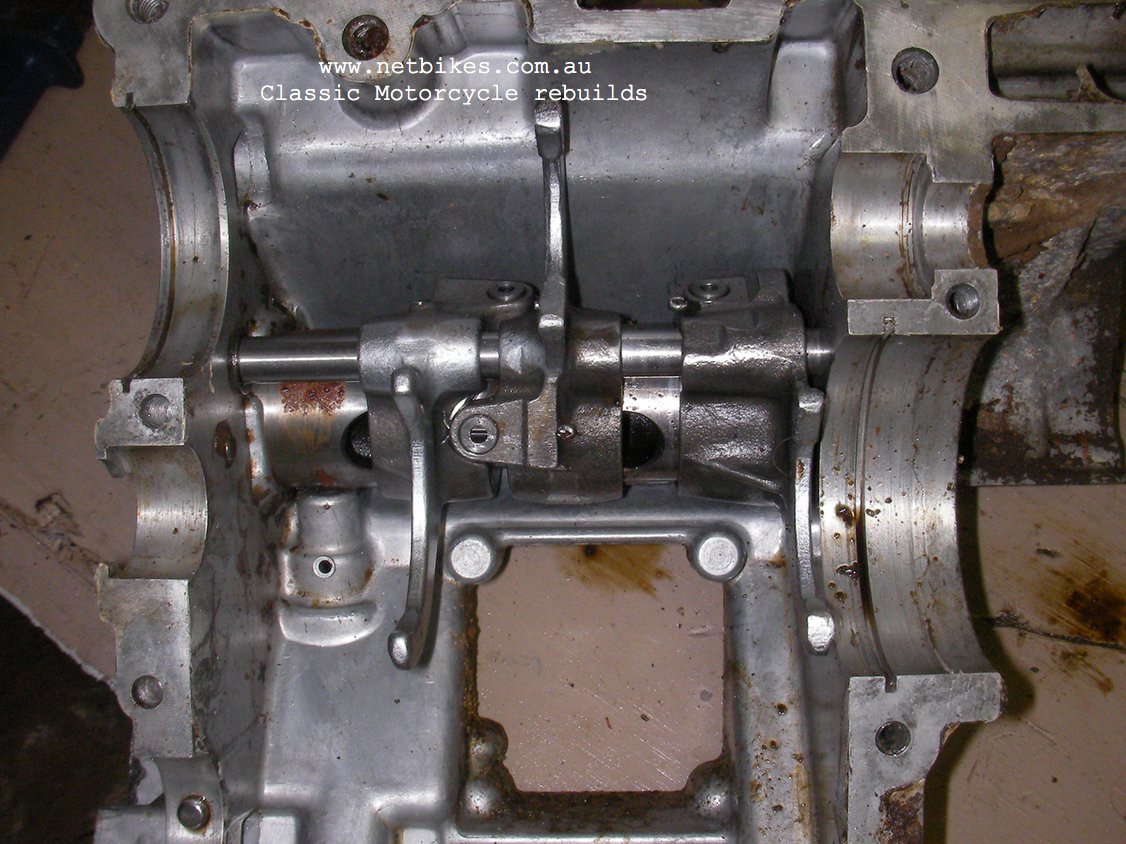
The motor is completely apart and the cases are now cleaned and ready for bead blasting. The crank has gone to Ron Russ for rebuild however I am yet to buy the seals or bearings needed so that will be a couple of weeks away. The frame and other black bits are at the powdercoater and should be ready this week. I have already painted the headlight brackets, top fork shrouds and headlight in black gloss. The tank has red factory paint under the yellow so it will again go red, on this model the metal tank panels were also painted. I have also stripped the carbs and cleaned all the jets etc, not sure what I will do with the body's, they don't actually look too bad so I may just leave them as is, just a good scrub up with hot water and soap. The front wheel now has new bearings and tyre and I have new bearings ready for the rear wheel. Below are pictures of more progress with more done not pictured yet. I'll take more of the cleaned up parts later this week. All for now. |

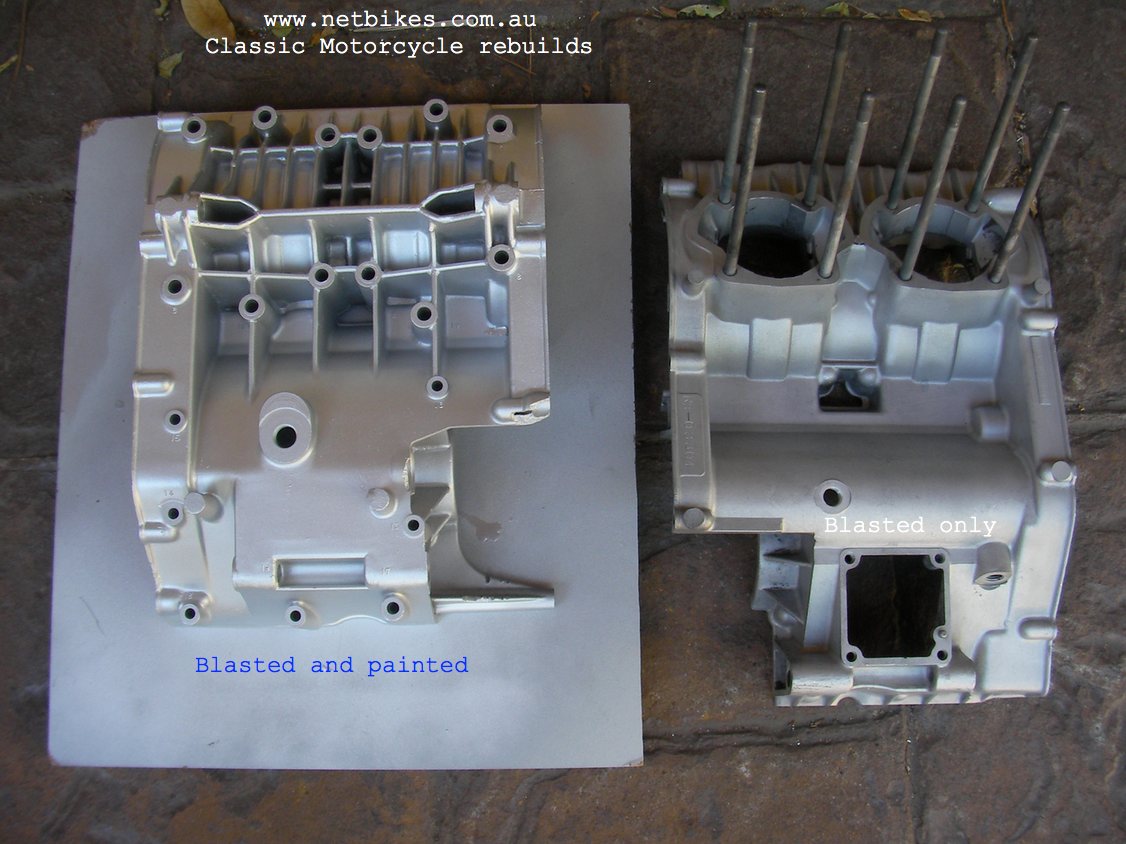
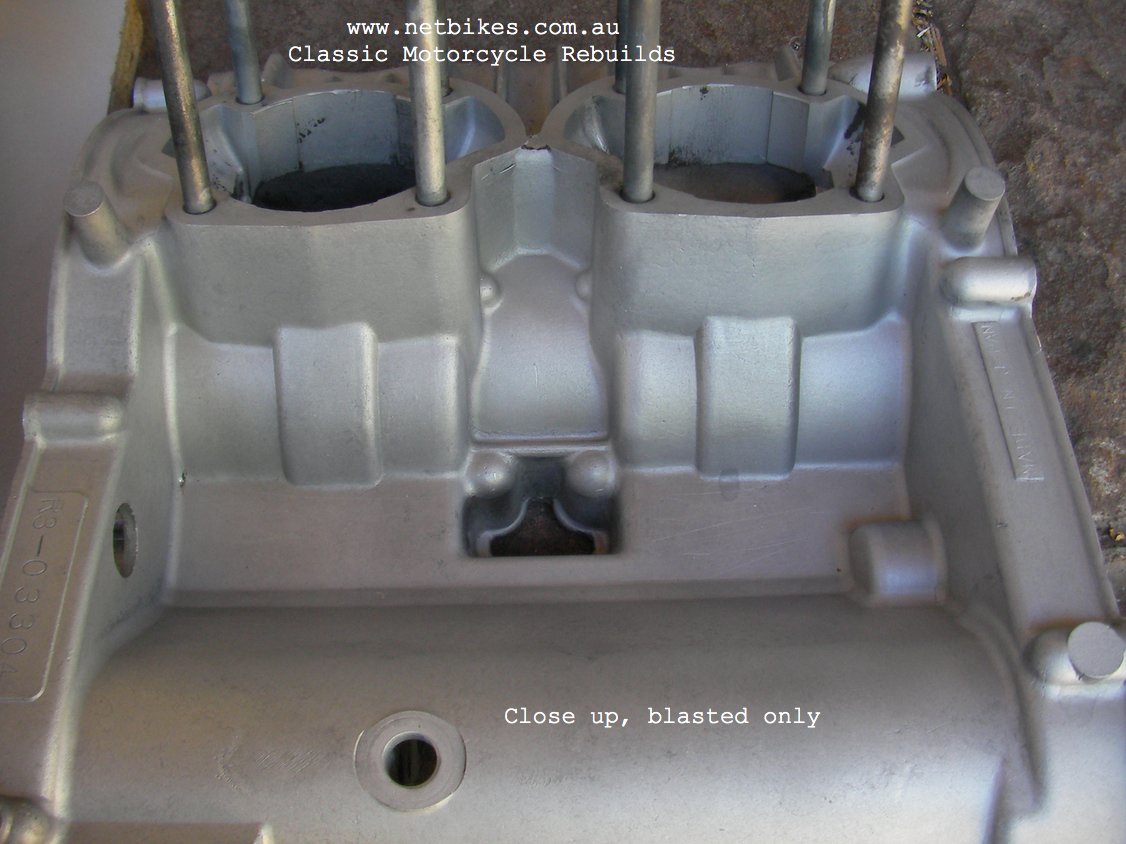
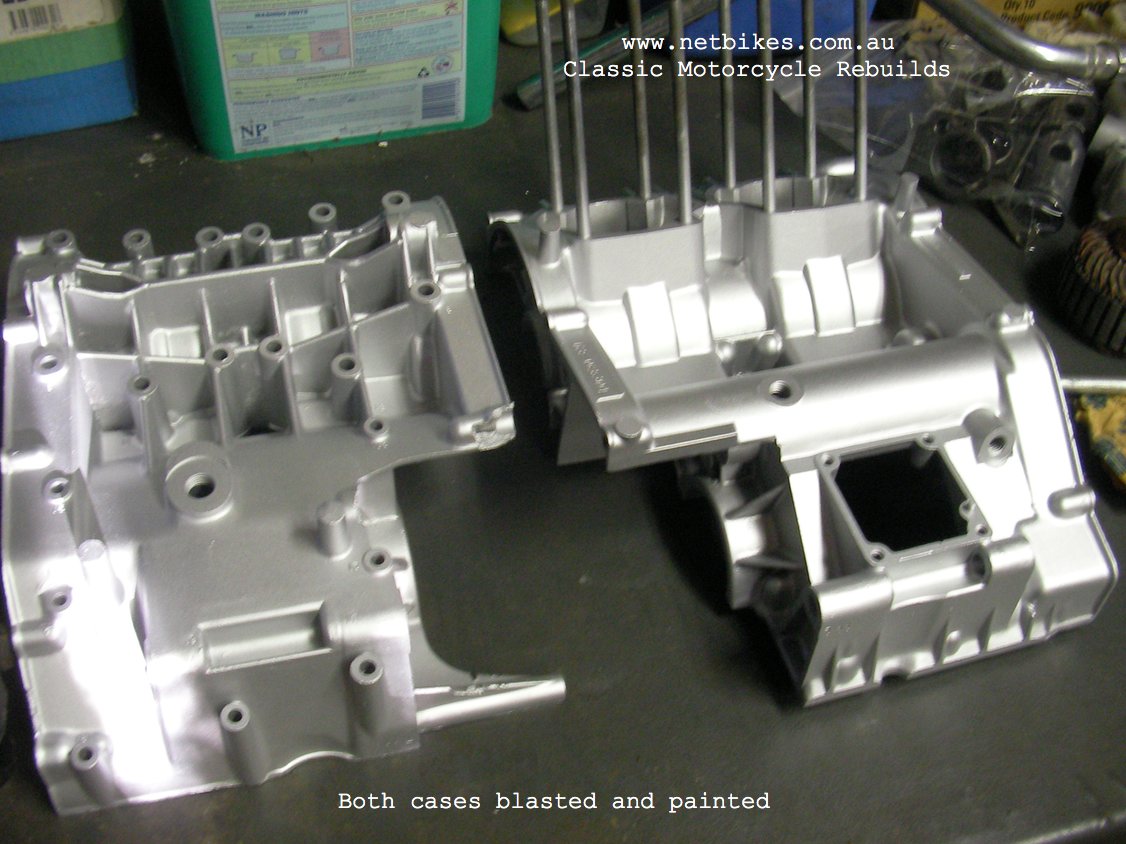
| Cases are now mostly ready for reassembly, they have both been blasted and painted, I am also going to put a 2 pac clear over them yet, hopefully in the next few days.
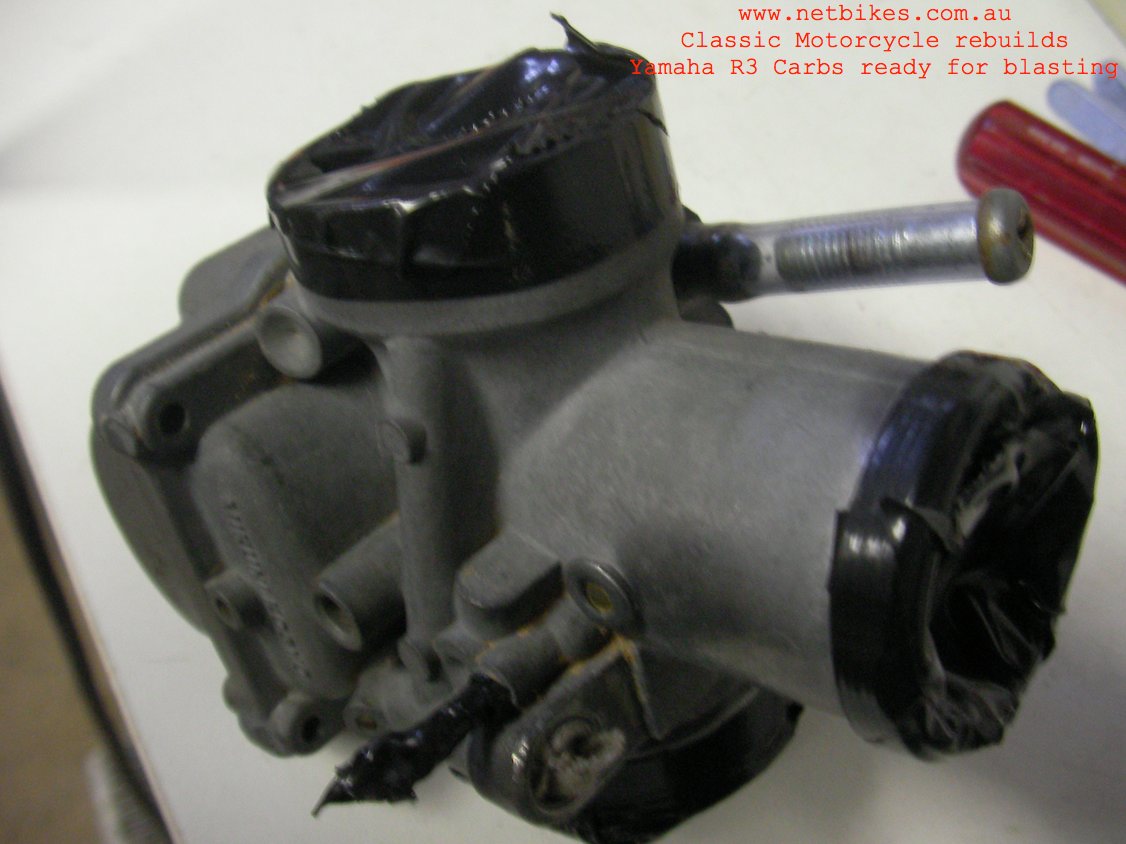
Pictures from left to right, one case painted and other just blasted, close up of the of case blasted only, both cases now painted, barrels prepared for blasting tomorrow, all grease removed and the piston sleeve taped over. I will be painting these black. |
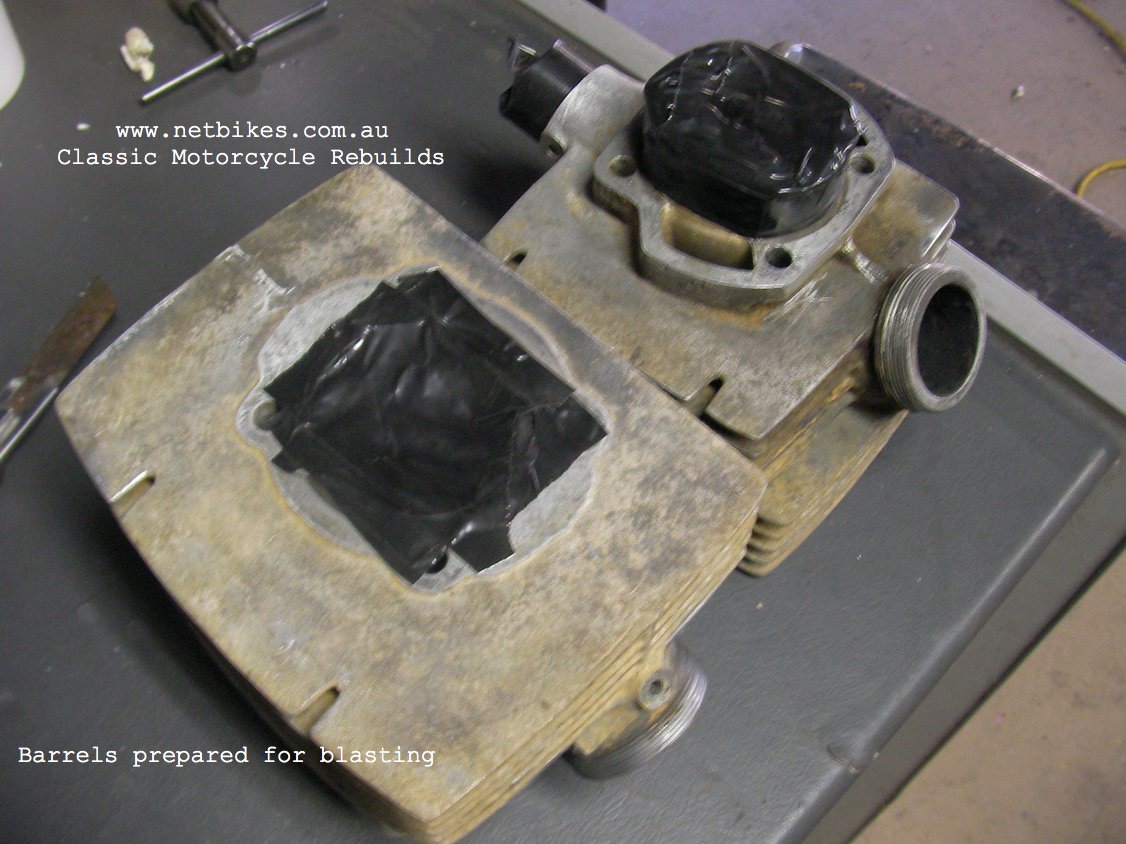
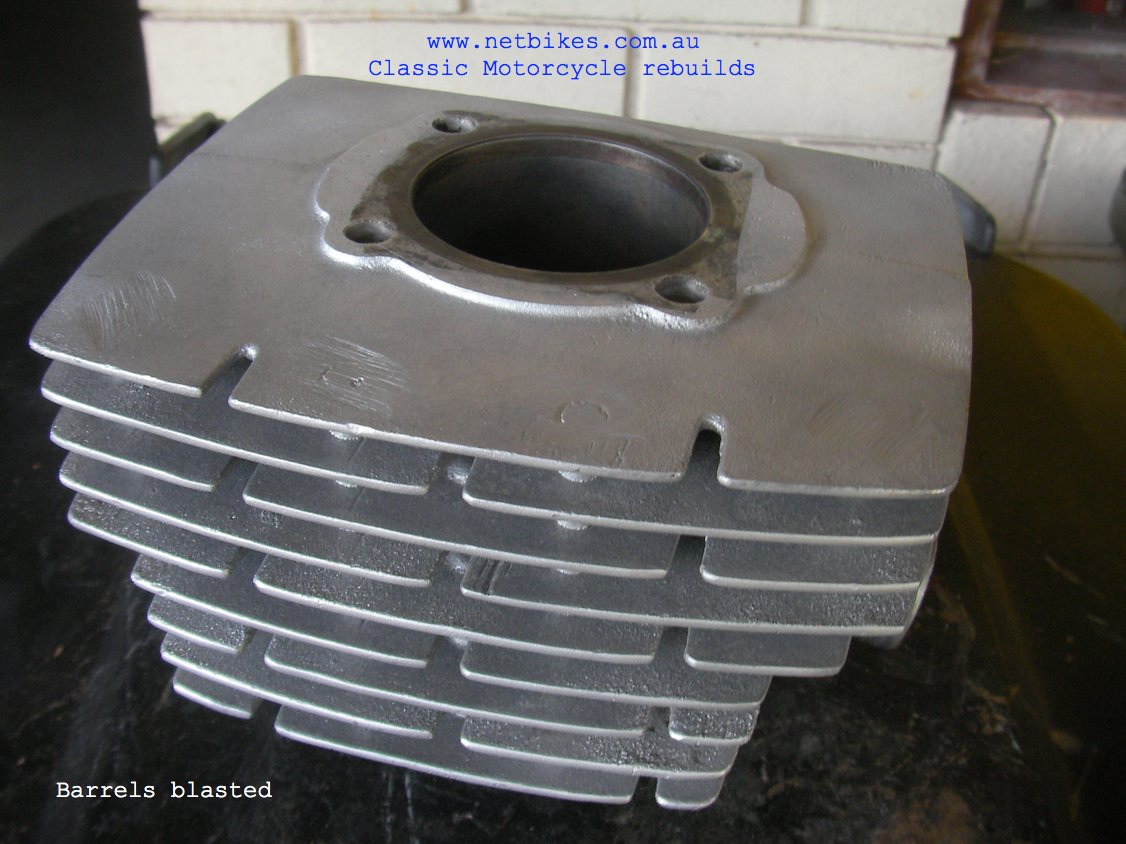
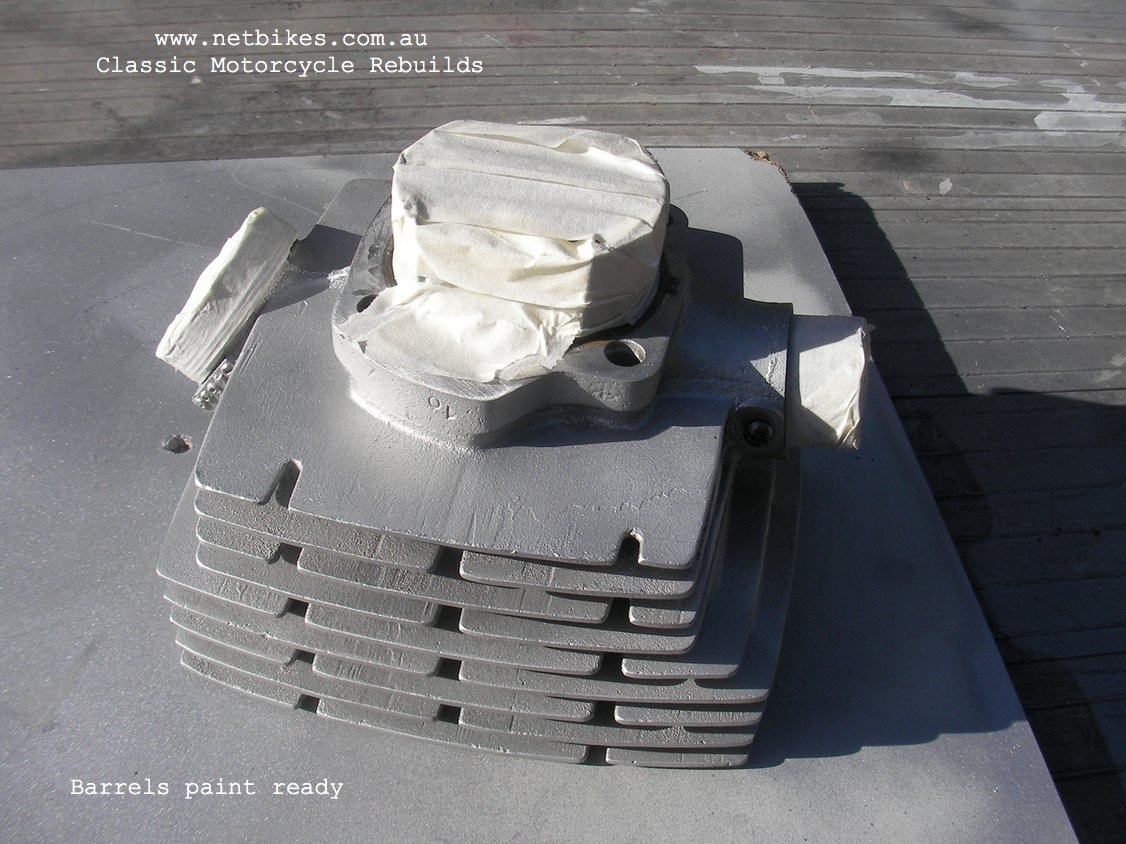
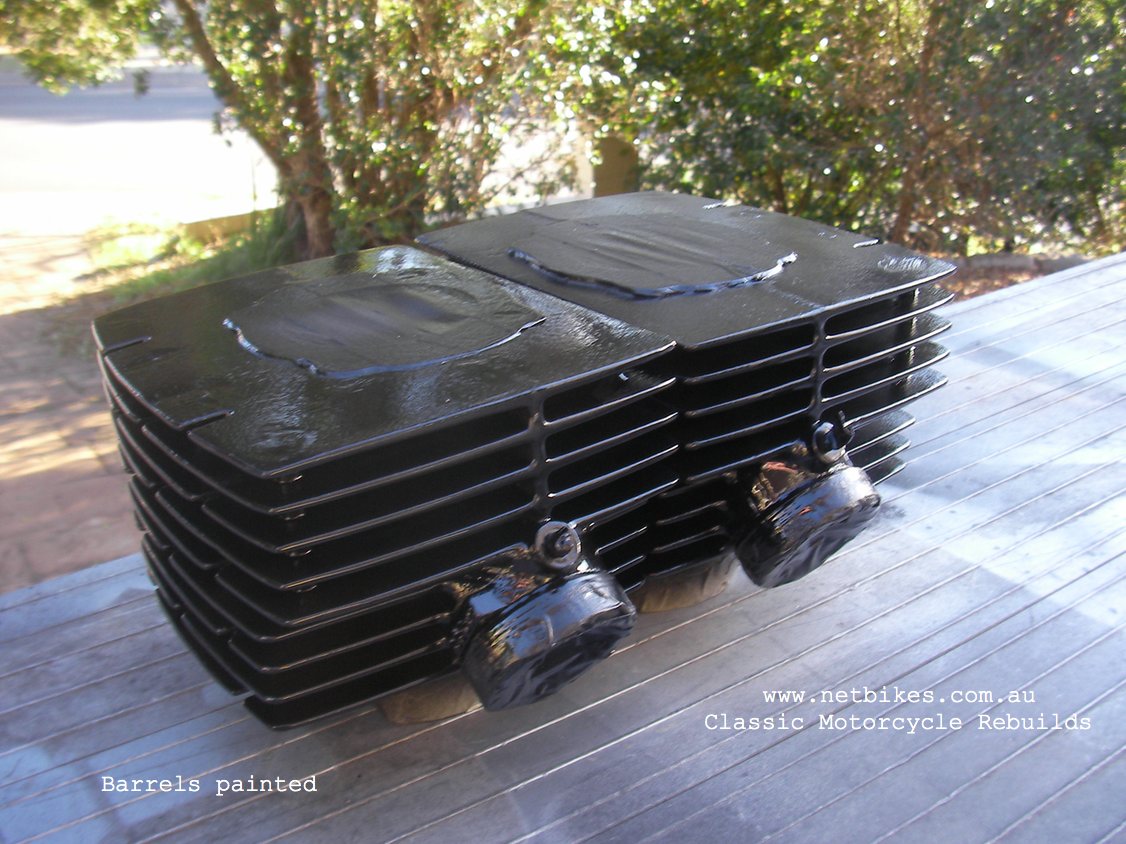
| I blasted up the barrels today, each one took a good 30 minutes or more, after about 30 years or more sitting in the grass what was on the barrels was stuck good. After blasting I washed them with hot soapy water, rinse, let dry in the sun and coated them with VHT gloss black, 3 light coats. Curing is 7 days and at that time I may take the paint off the barrel fin edges.
Pics below are barrels blasted, then masked up for painting and then painted. |


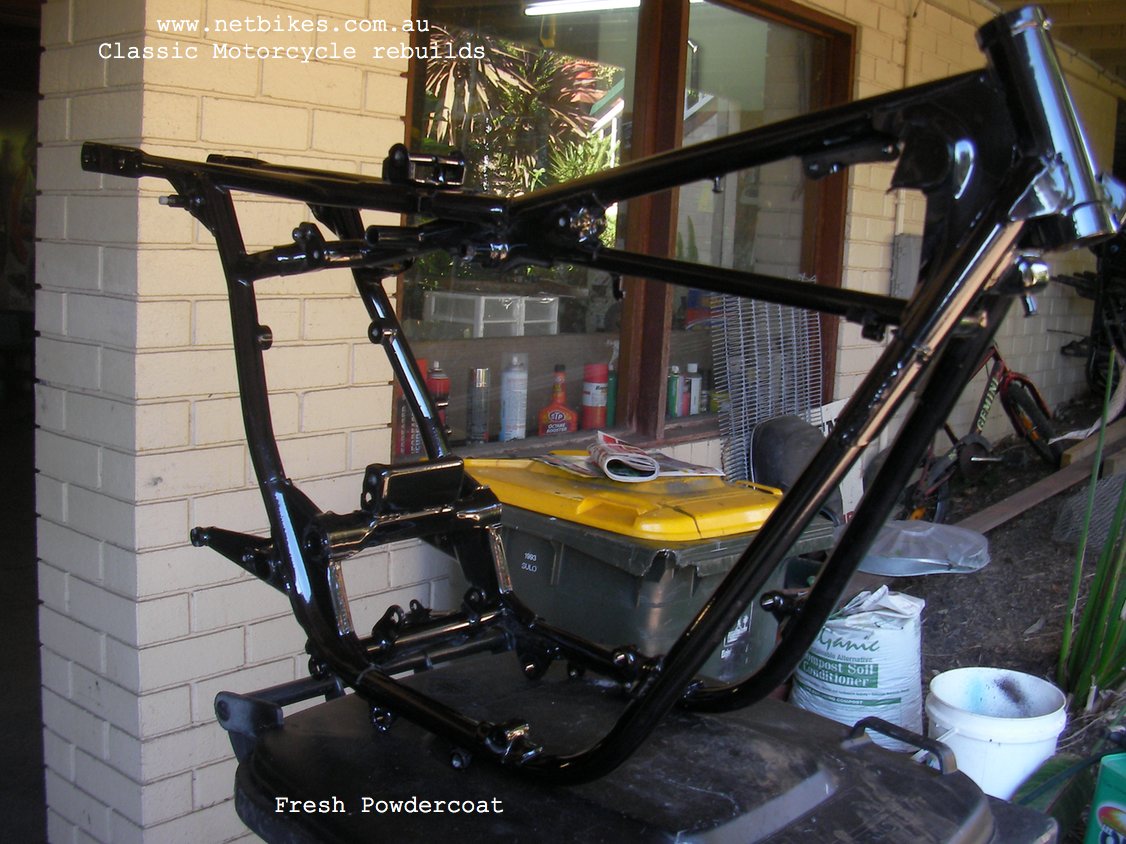
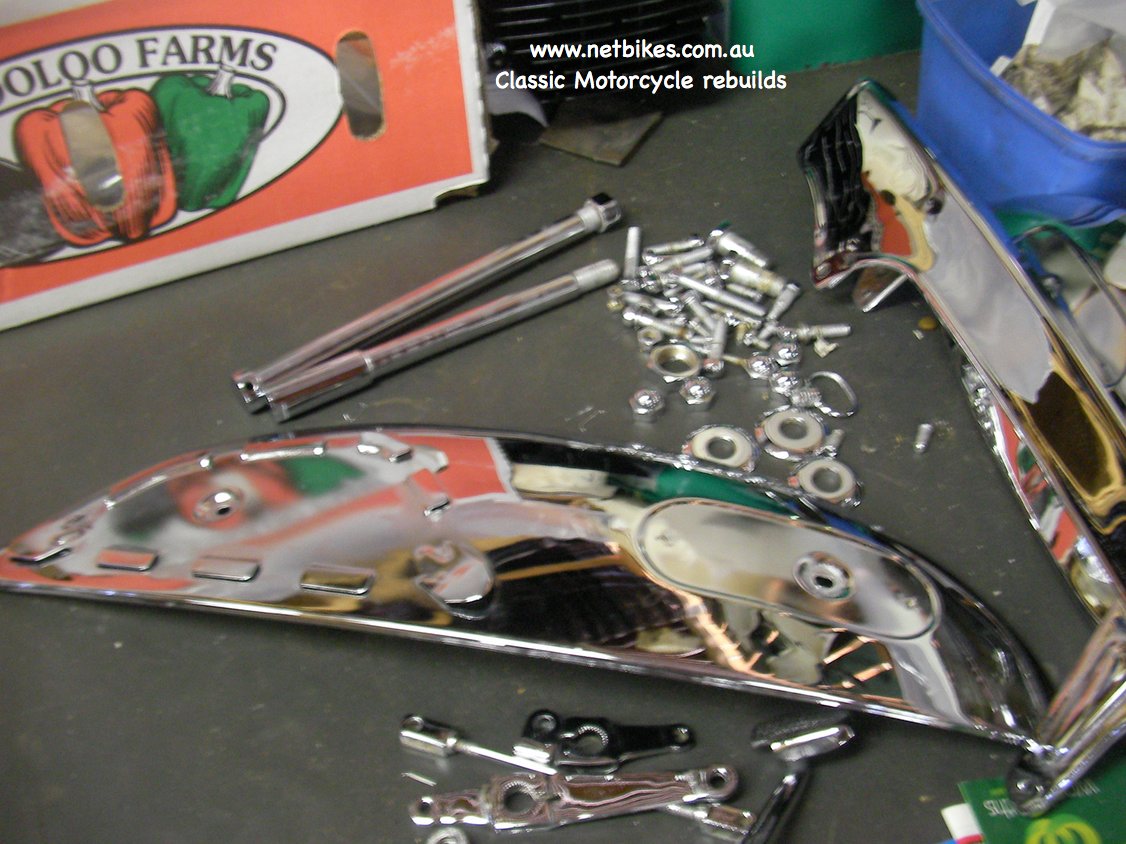
| Moving onwards, I received the powder coat frame and parts back yesterday, It was done by Alan Baggs, you will find his business details on the Services page
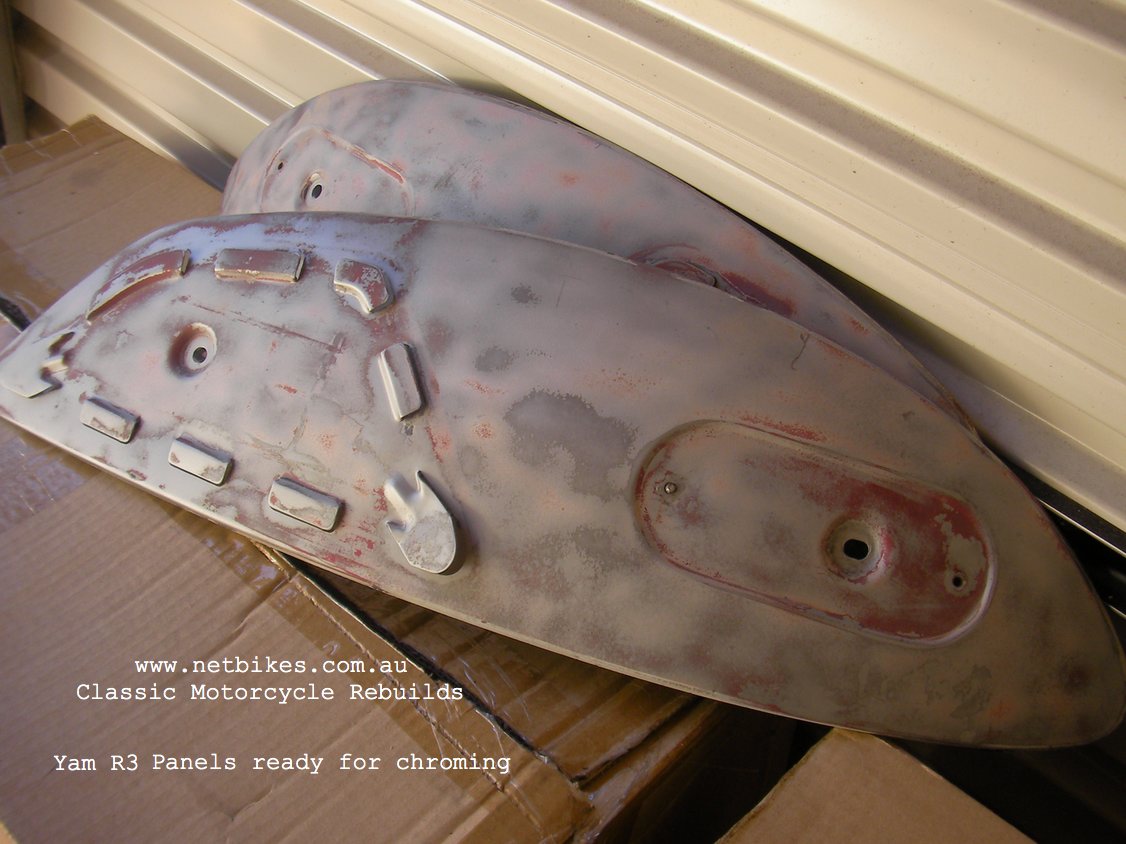
. He and his crew did a awesome job, it turned out beautiful especially considering it was in an awfull state before. All thread holes etc were blanked off pre coating. Today I clear coated the painted engine cases and will do more coats on them tomorrow, I also prepped parts including the tank panels ready to go for chrome plating. The panels were originally only painted on this model, near as I can tell at least, or if they were once chrome it has been completely stripped off in a previous life and there is no evidence they were ever chromed that I can see. However as they are in good undented condition I have decided to have them chromed. I AM ON THE LOOKOUT FOR GOOD RUBBER KNEE PADS, IF YOU KNOW OF ANY PLEASE ADVISE.
Below pictures, frame powder coated, clear over coat on the engine cases, tank panels ready for chrome plating. |

![]()
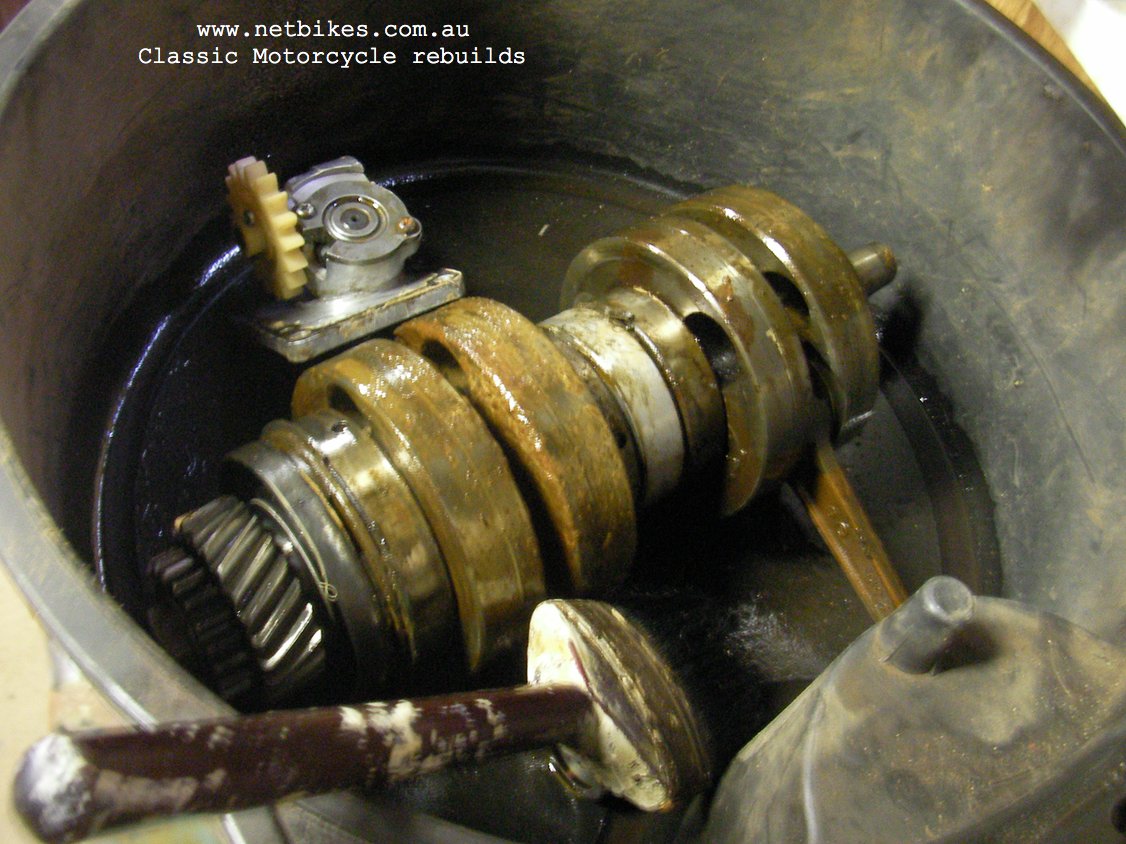
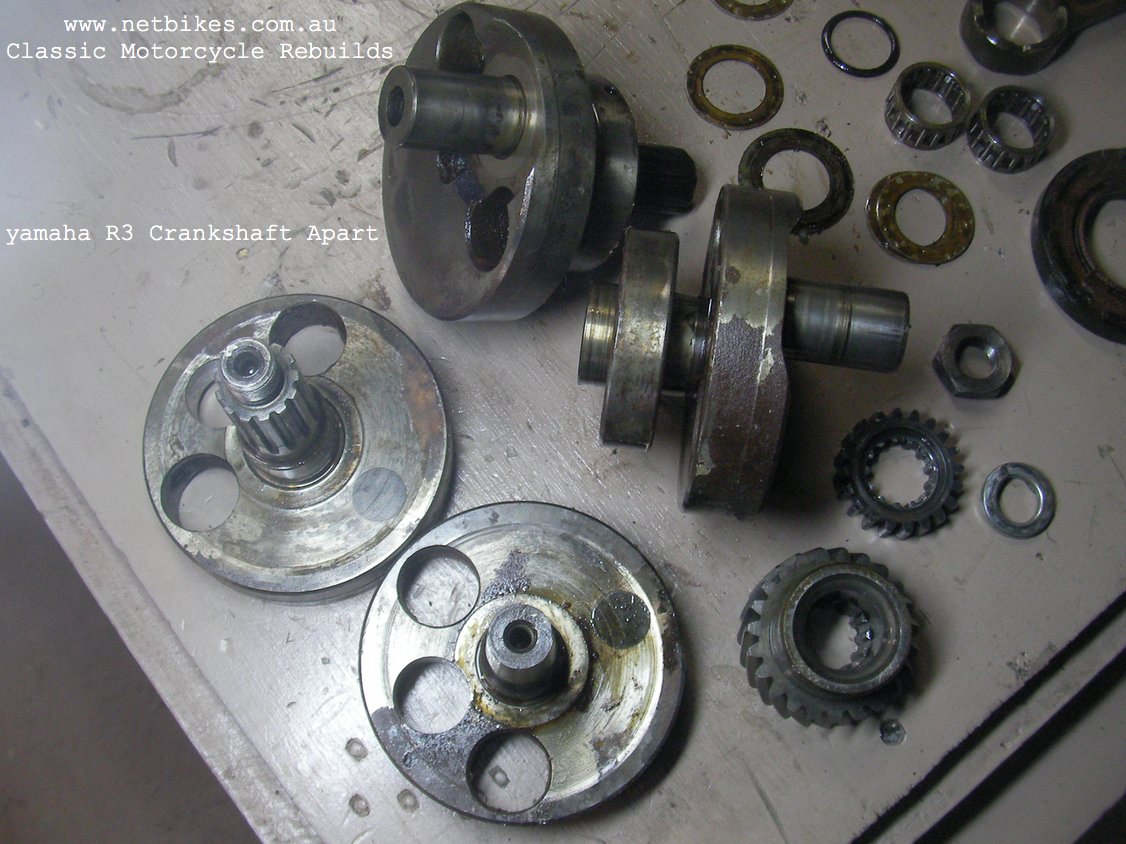
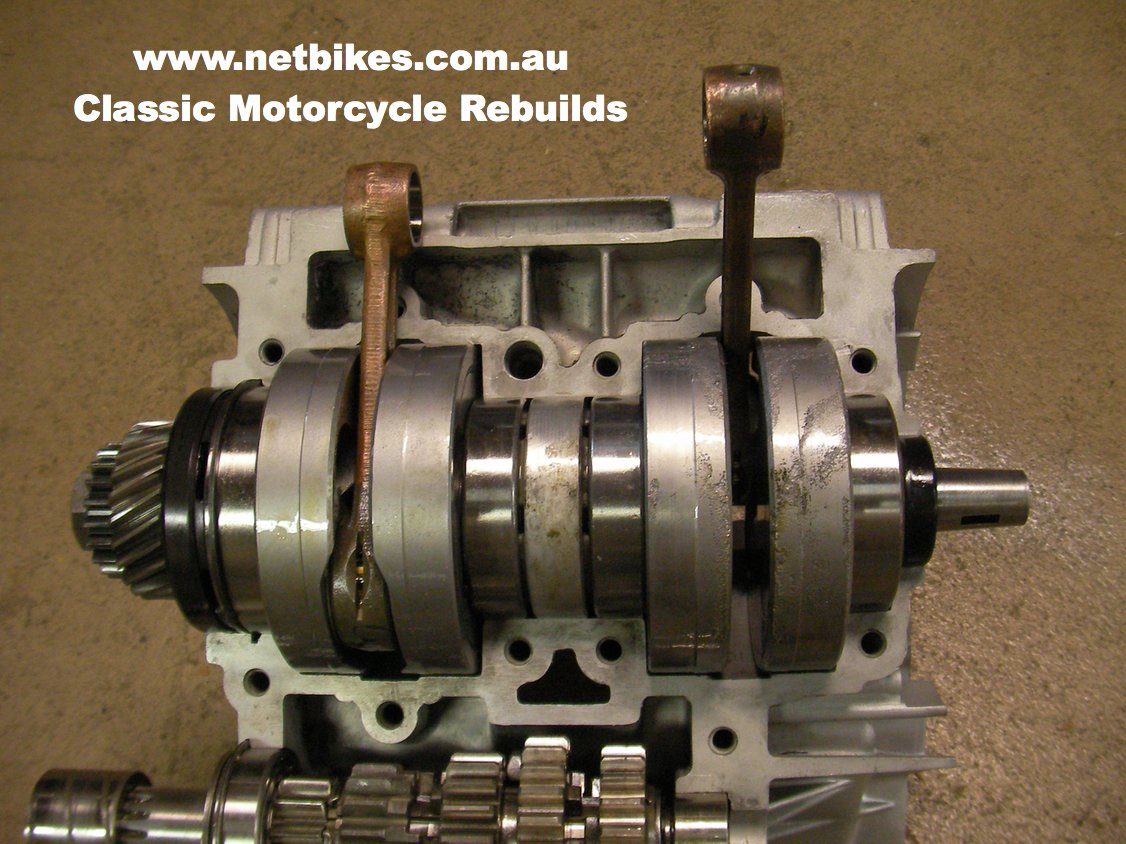
| Well here is the crankshaft pulled down for inspection, it is not good news, every bearing, every seal,both rods and the pin will need replacing. That's the way it goes sometimes. |

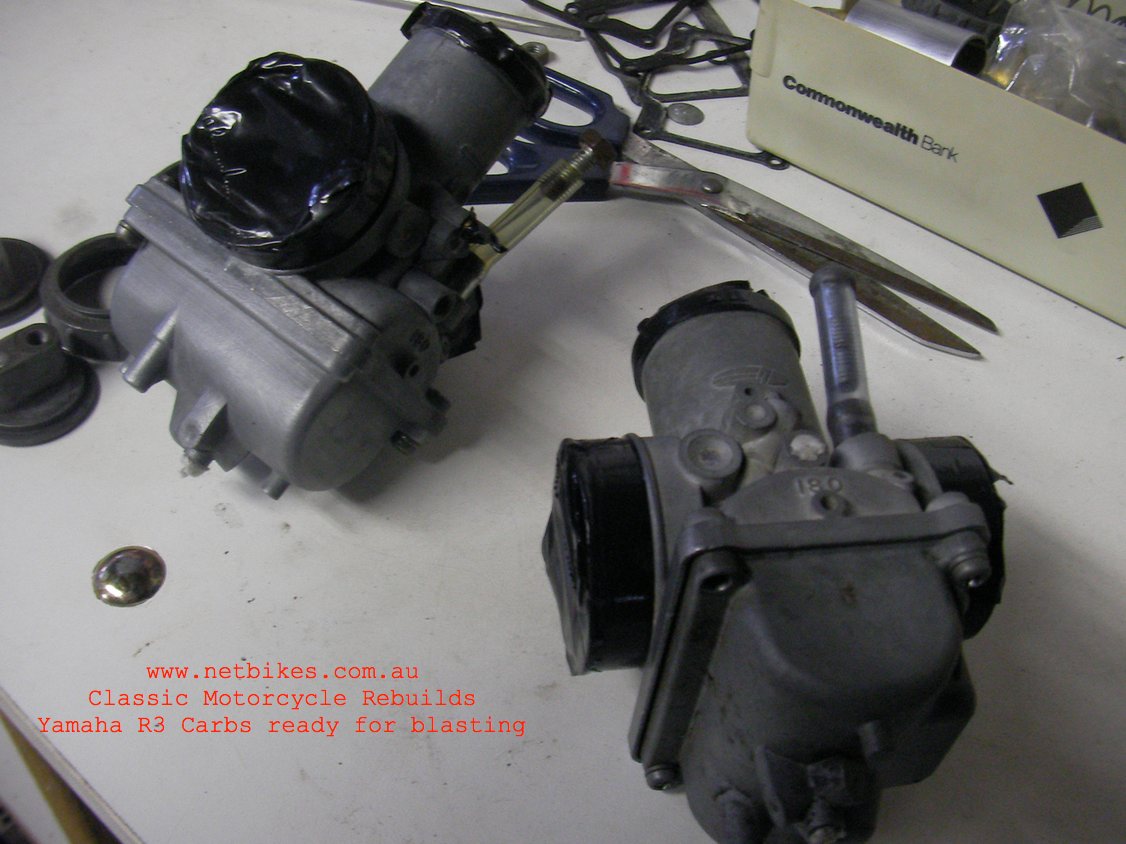
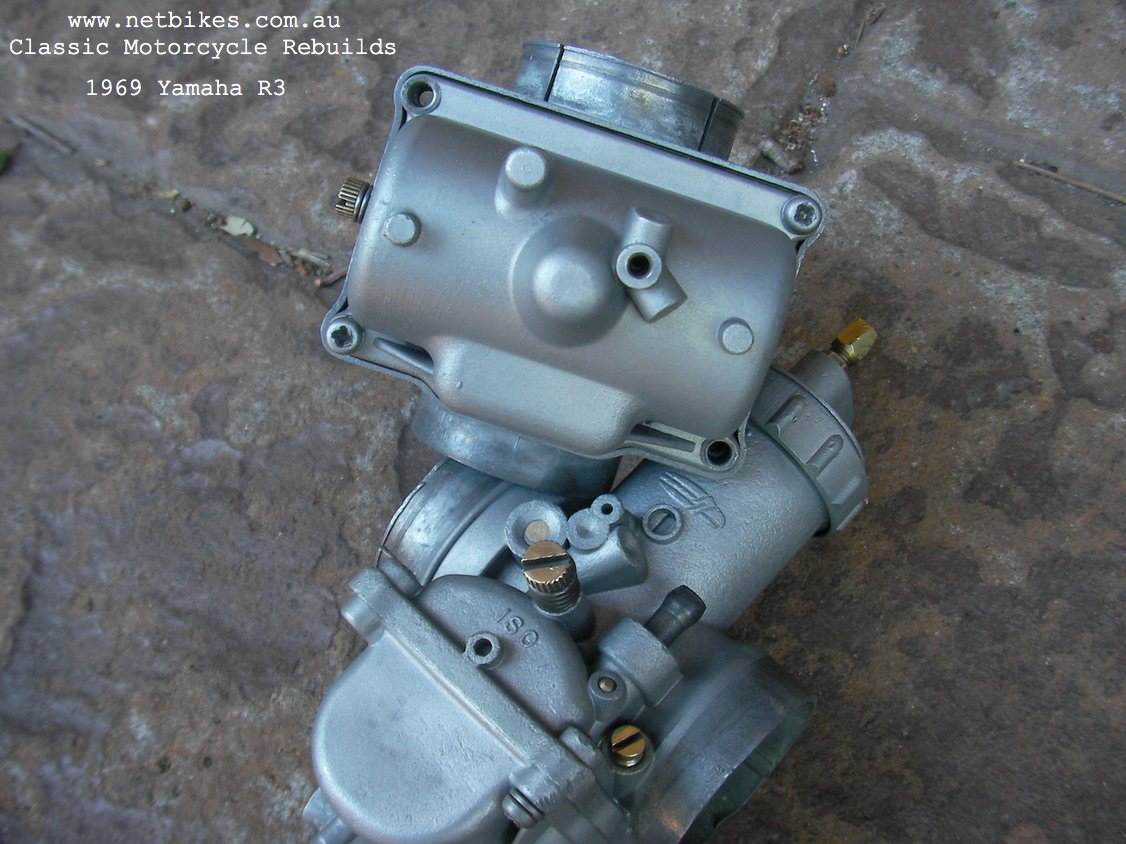
| Carbs were totally striped, all grease and dirt removed from the body's them washed in hot soapy water. After fully dry they were re assembled minus the internal jets and ALL holes plugged with tape and small bits of rag. I then bead blasted them on low pressure with a fine medium glass. Next I removed the tape and blew everything out with compressed air, took a lot of time here to be sure I got in very hole inside and out, then they were again washed in hot soapy water,more compressed air blowing and let to dry, then dropped into a basin of clean kero and left for an hour, this is done so it penetrates the alloy pors and any fuel spills will then clean off easy. Now I have read wife's tale remedies for cleaning up carb bodies, lemon juice, vinegar, alloy cleaner, sonic cleaning and more, they all have "some" cleaning ability but I have found none of them does anywhere near the job of bead blasting, the ONLY better way than dry blasting is wet blasting. Oh and don't fall for negative comments like blasting will wreck your carbs, it will get in and you will never get it out. With carbs it is the pre blast preparation and post blast cleaning.
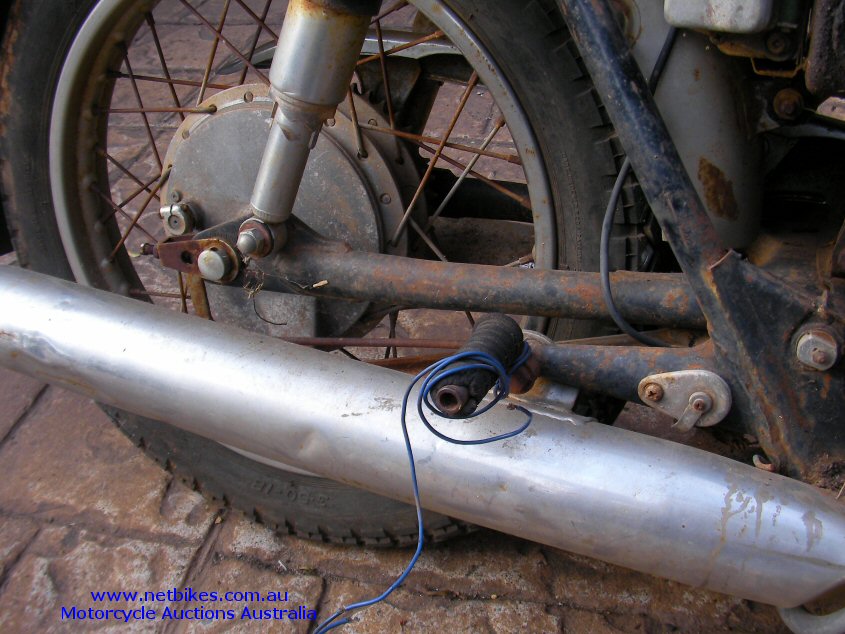
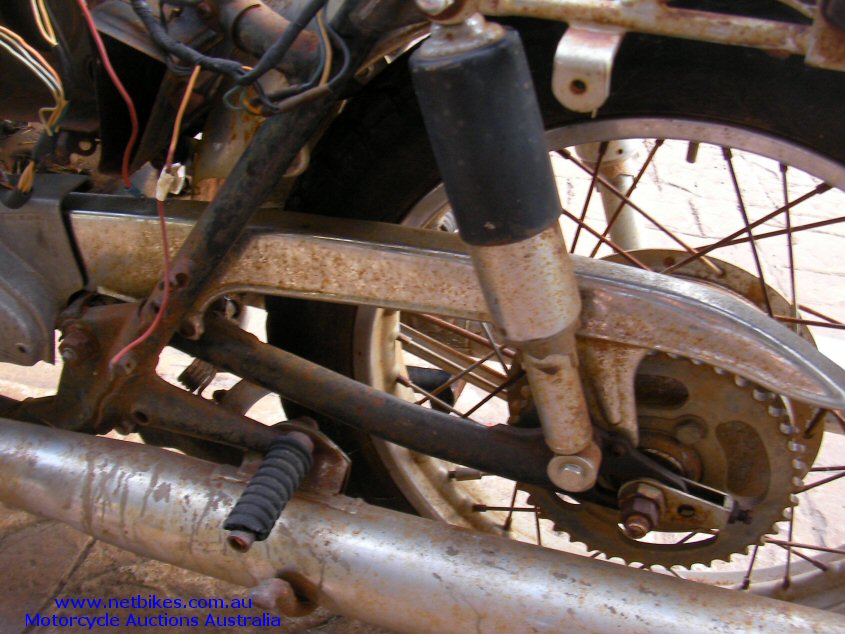
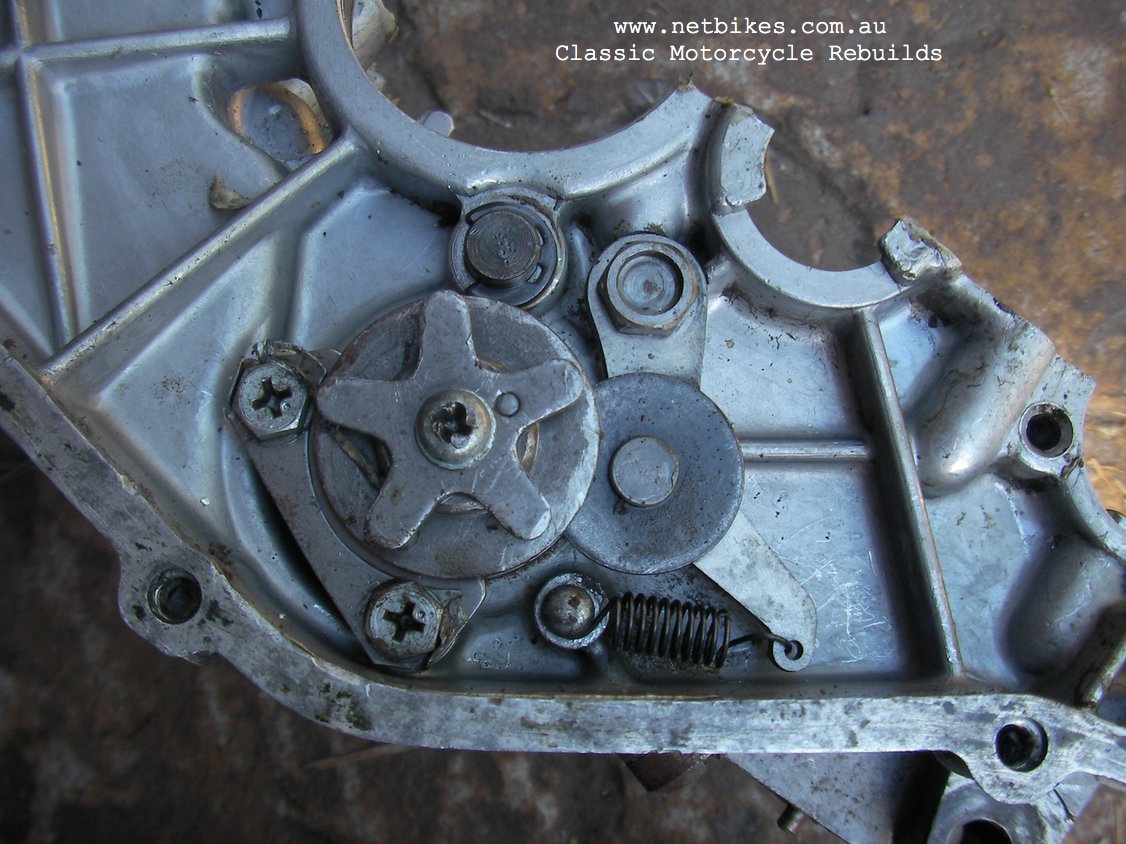
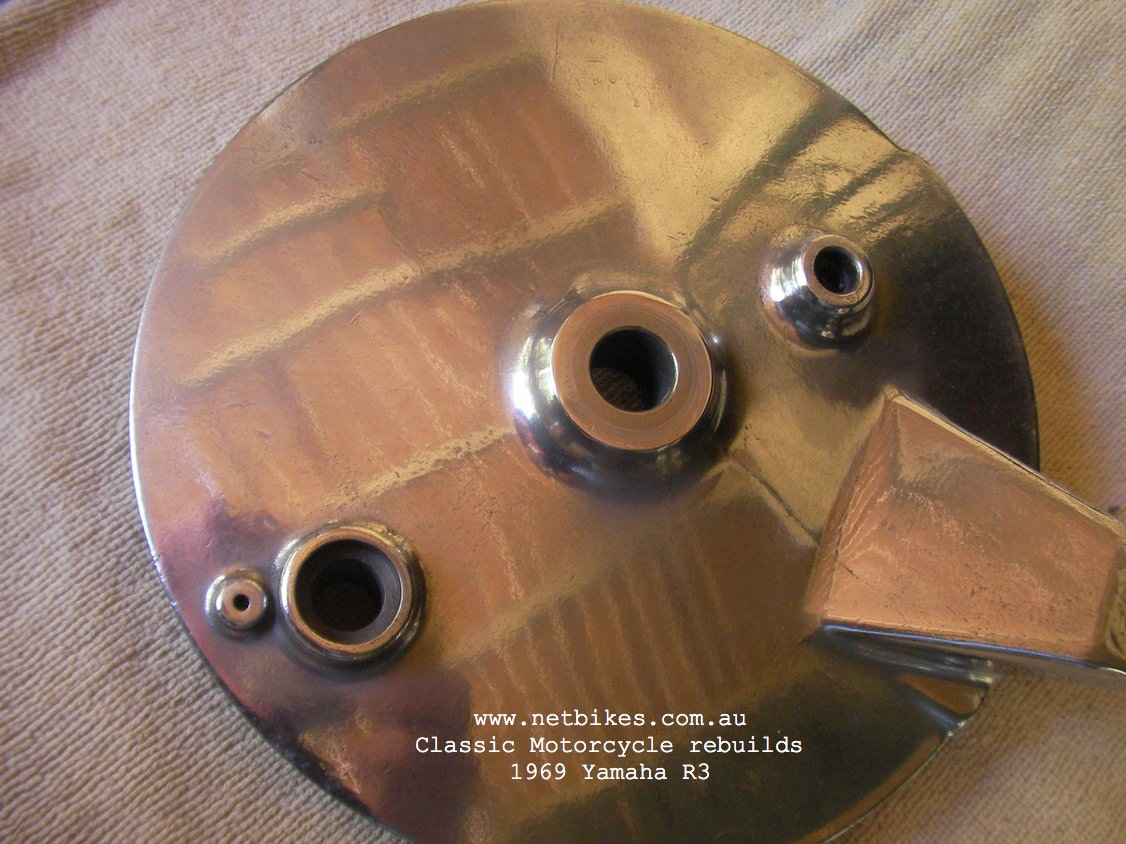
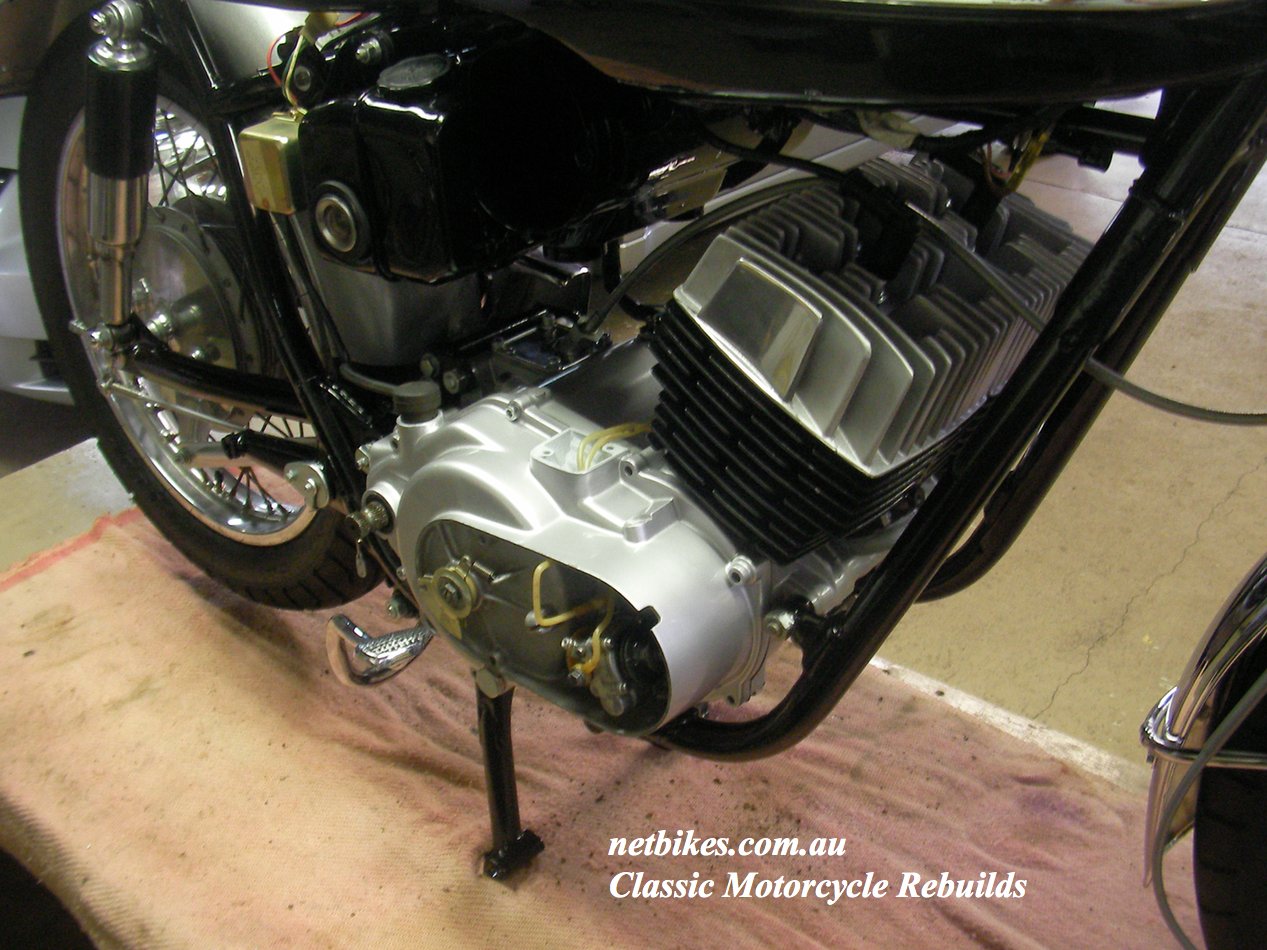
I have started to polish the alloy now, most of the alloy on this bike has water corrosion and that is never going to come out without serious linishing, I am not trying to create a show winner here so basic but steady polishing is fine with me, if you enlarge the pic of the brake plate below you can see the corrosion I refer too and the sprocket holder has had the drive chain slapping against it in a previous life, The generator cover in is much nicer condition, I bought that from a ebay US seller, the one that came with the bike has a broken lug mount. |


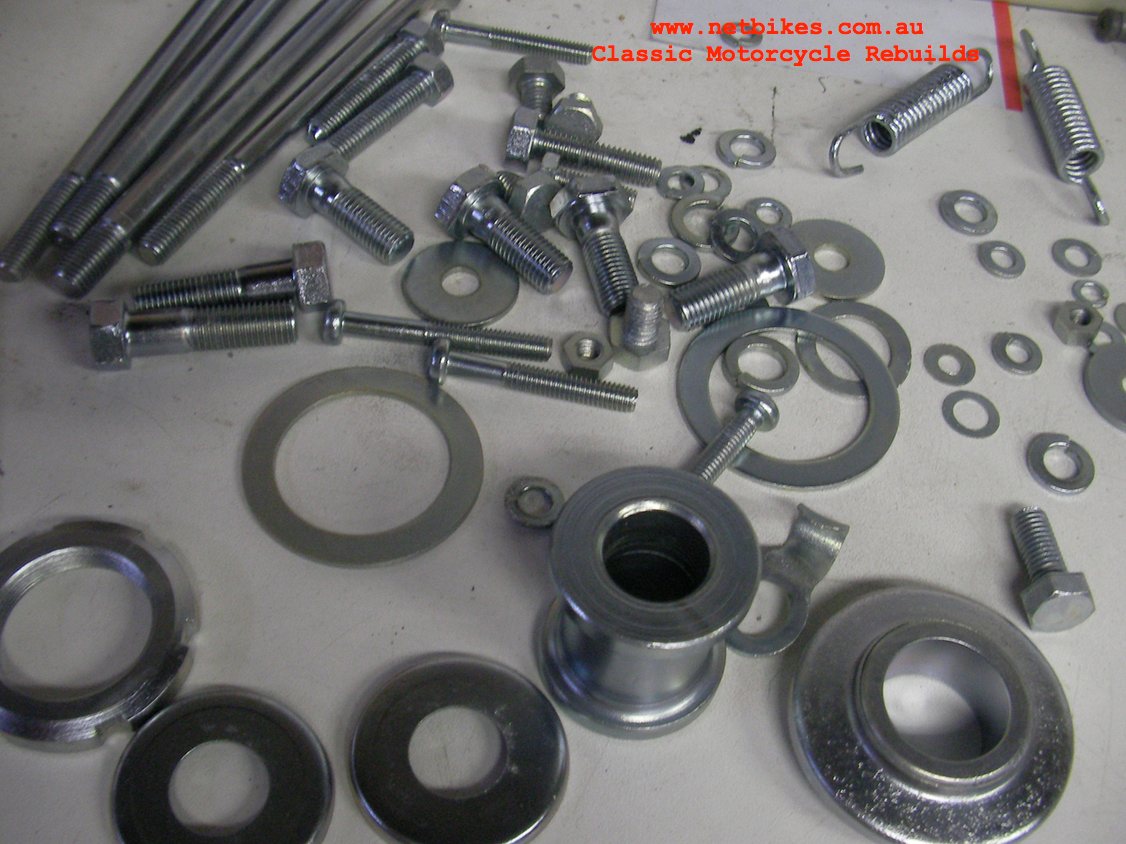
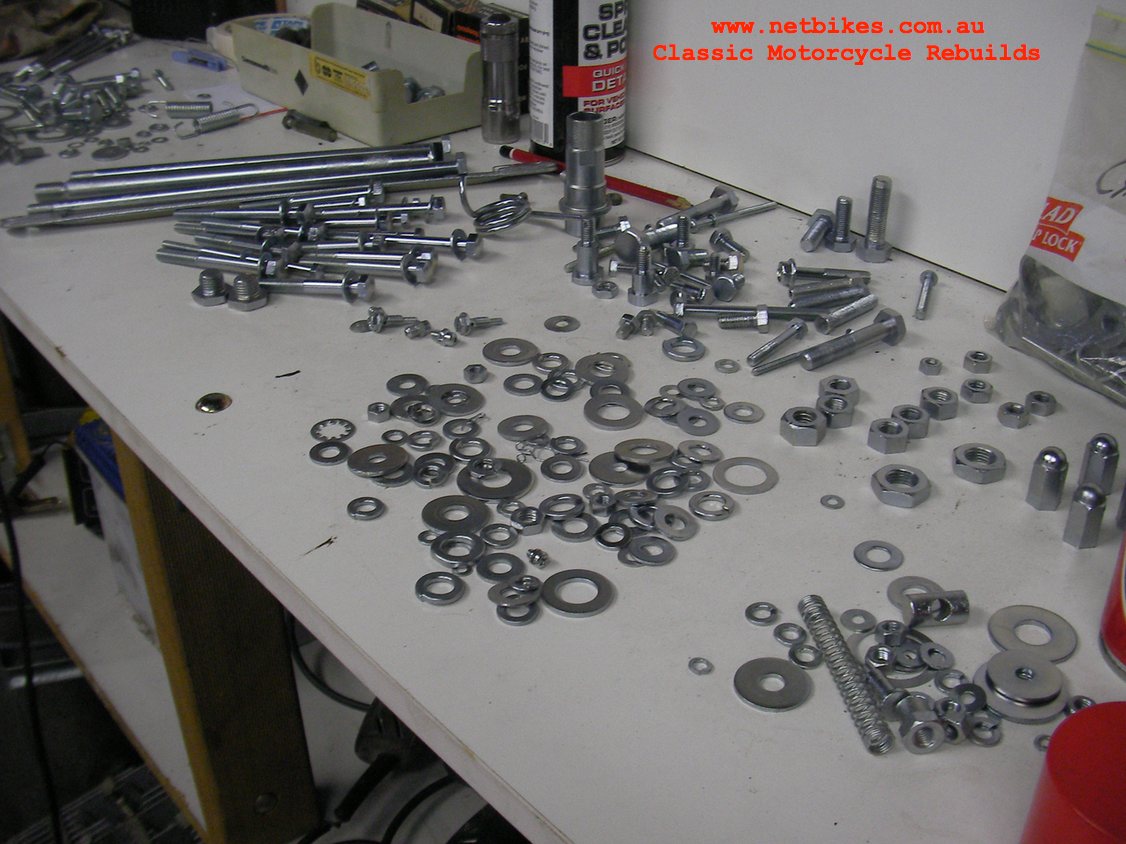
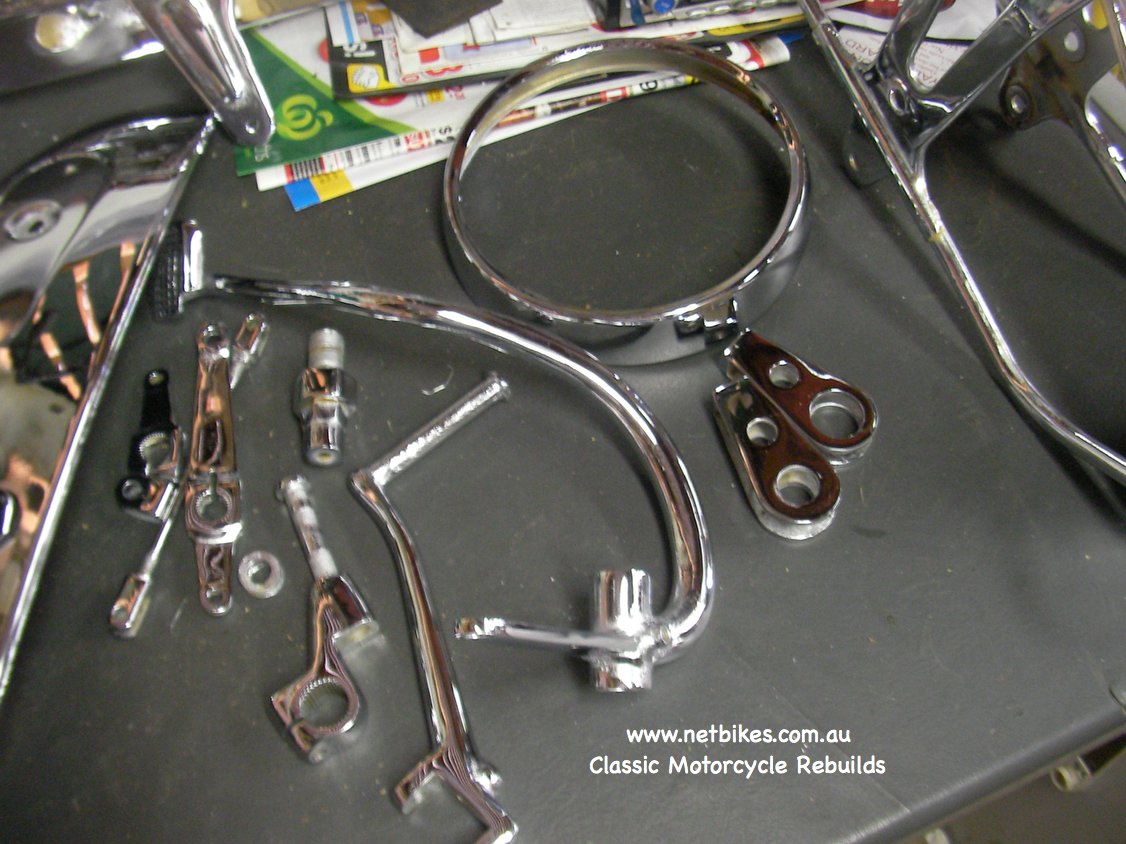
| All the newly zinc plated threads arrived today and I have now begun some of the frame assembly, however I will still be held up a couple of more weeks waiting for a few frame related parts that have gone to the chrome plater. Pics below of some shiny threads. |
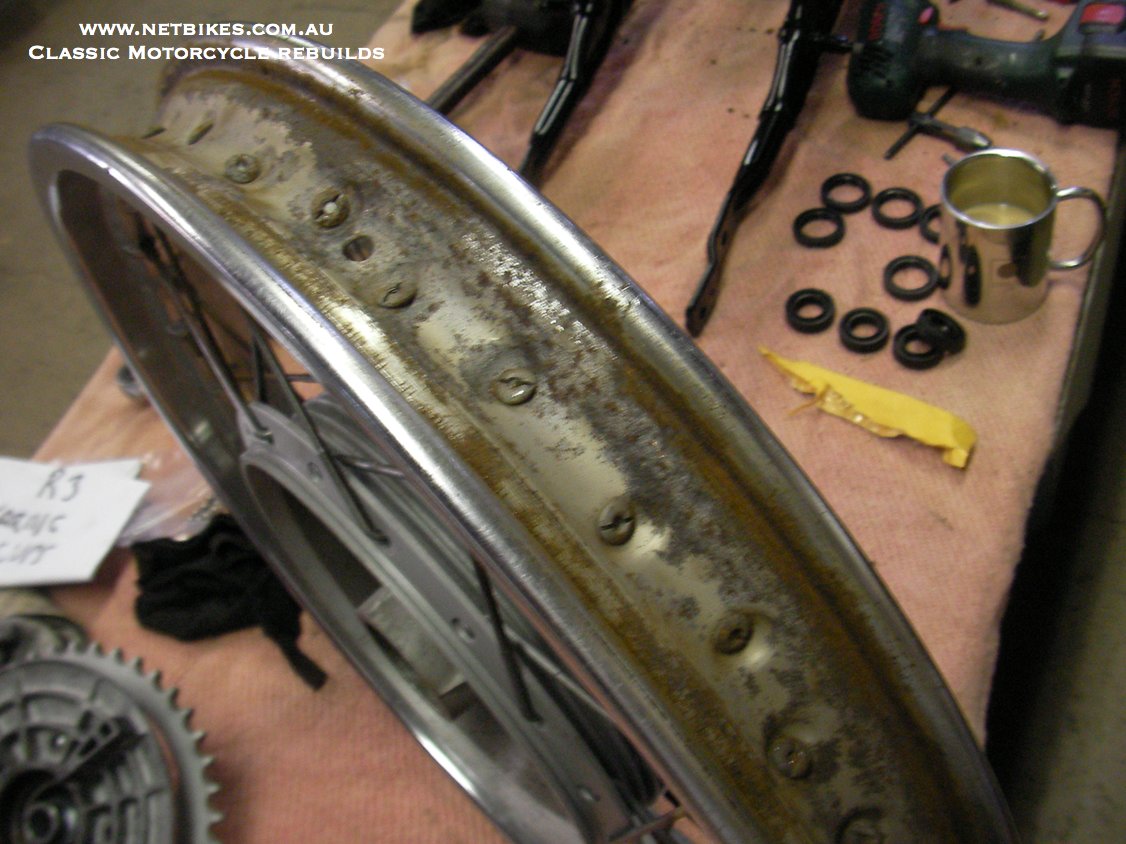
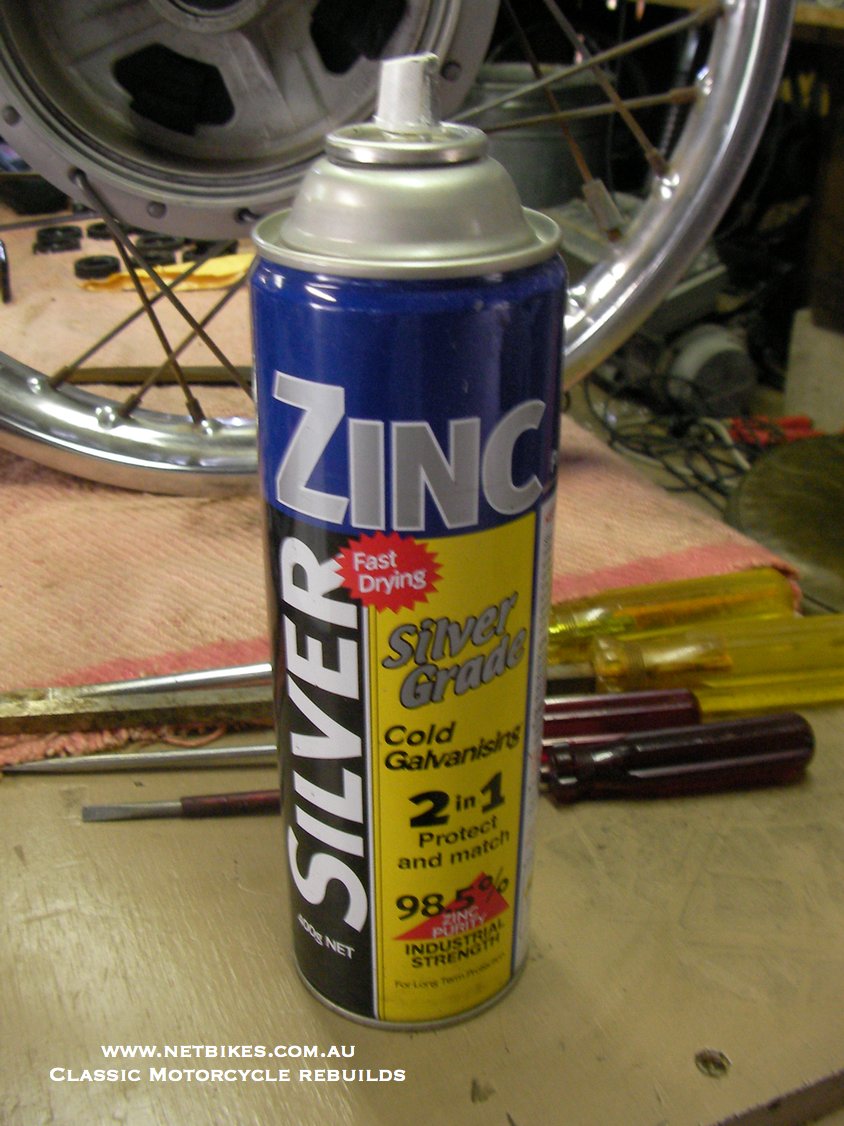
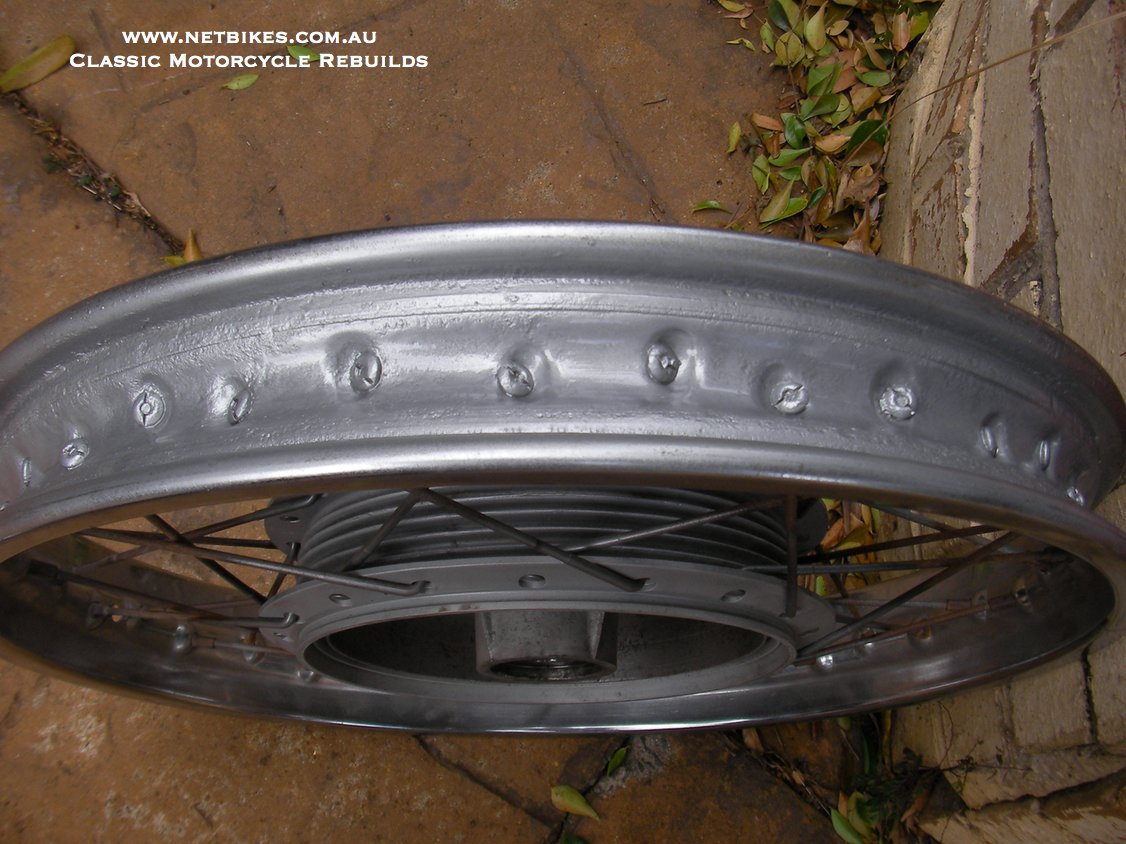
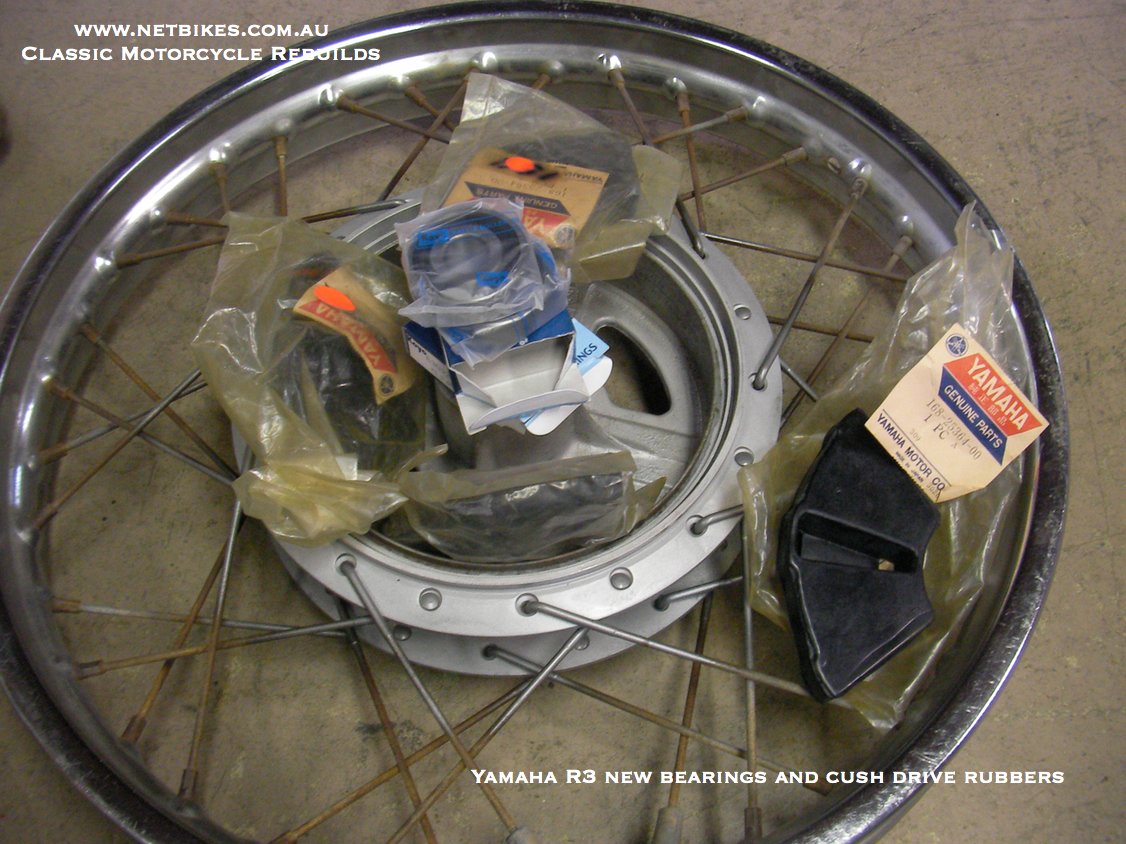
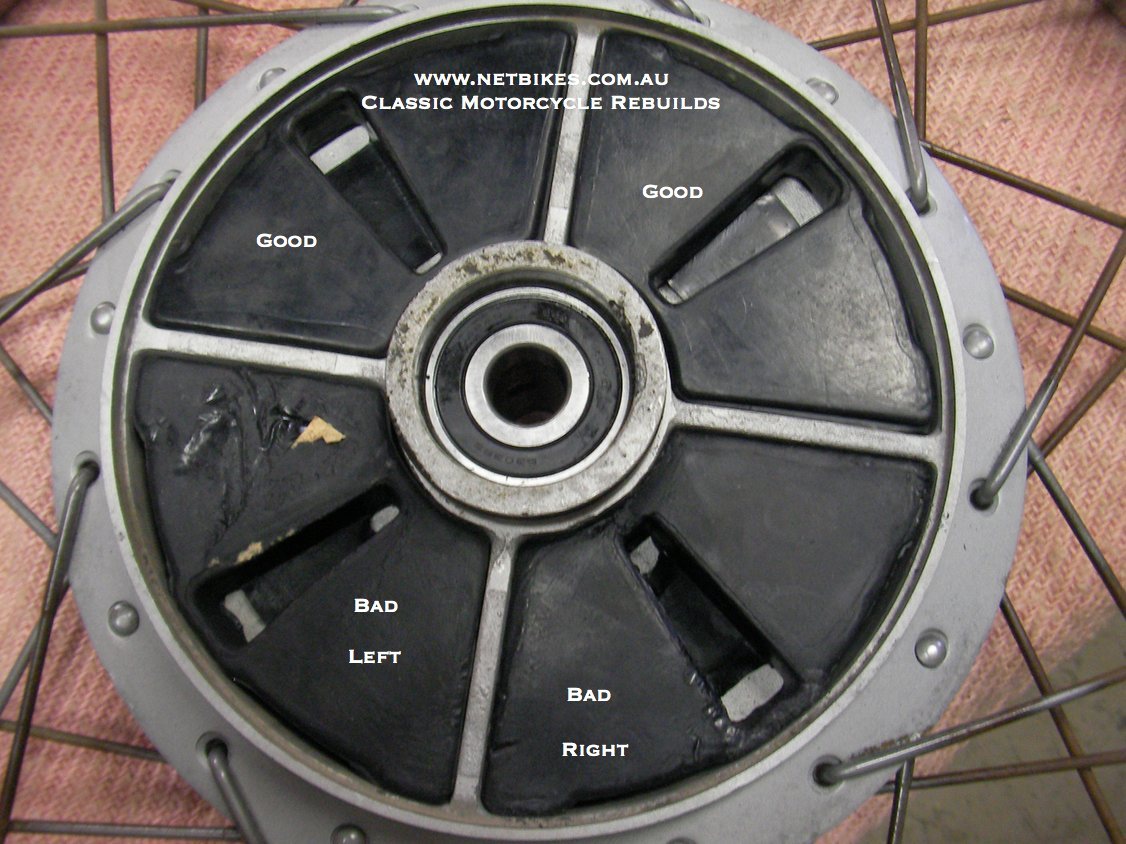
| The cush drive rubbers arrived yesterday and I had new wheel bearings here so I decided today was rear wheel day, firstly I removed as much rust as I could from the inner rim and painted it with zinc rust proofing paint, next the new bearings were fitted and finally the cush rubbers, but on opening the new packets I found two of them are very ordinary, one looked like it has been squashed under something heavy for a number of years and the other look like it has melted, I have informed the seller and await his reply.
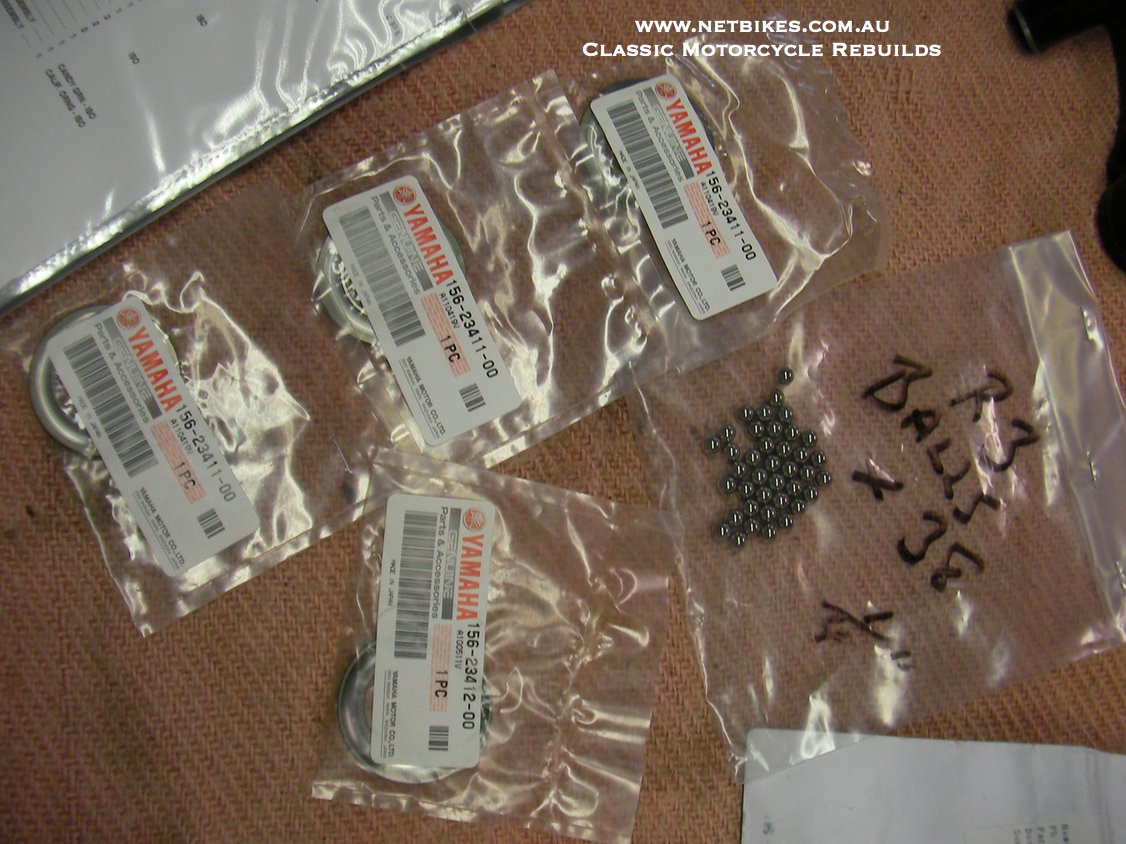
I moved onto the steering stem to fit it up to the frame with new bearings and cups, but no that's not happening today, again on opening the packet the cups came in I found I had three of one sort and one of the other so tomorrow I have to ring the dealer and sort that out. Oh well just not my day today. Pics below include paint I used for wheel, wheel before painting, wheel after painting, bearings fitted, new steering stem parts. |

| Well I went away for a week and arrived home to do some house type work and today has been the first chance I have had to work on the bike, thank goodness, I was getting withdrawal's:)
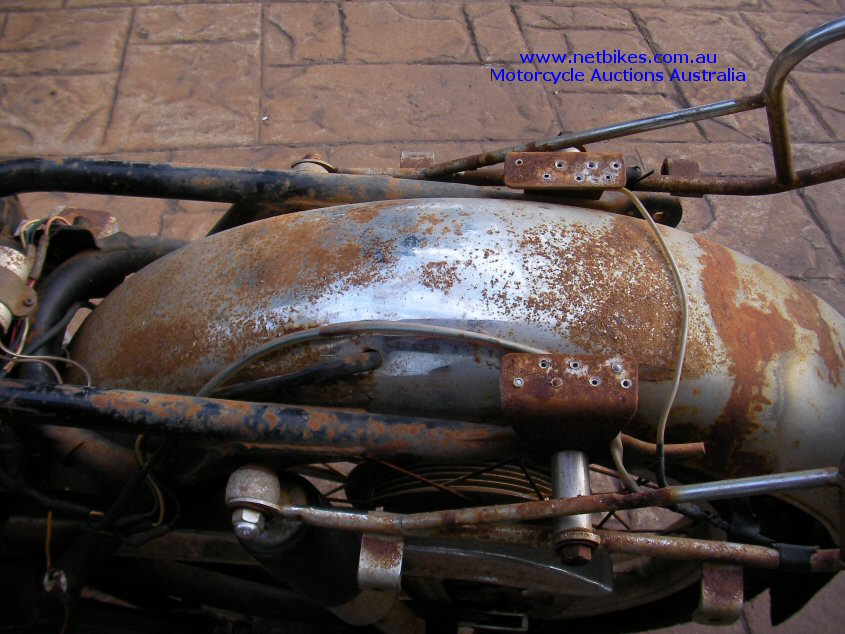
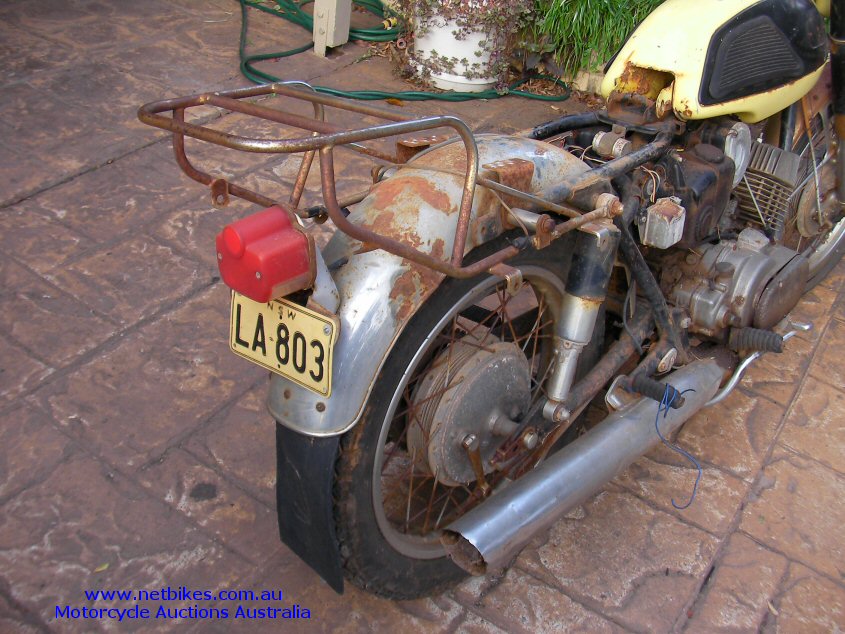
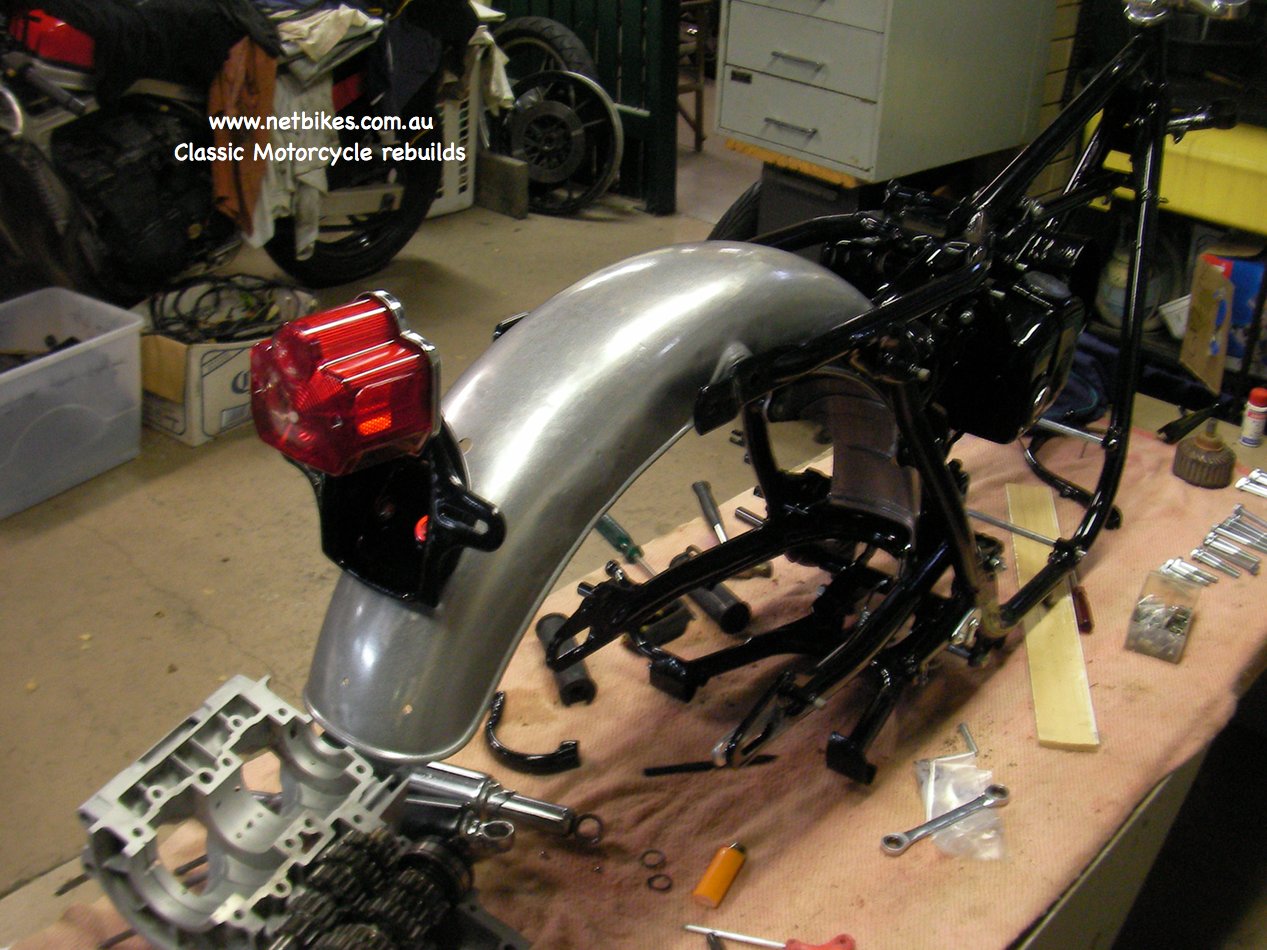
Today I worked on the frame and frame parts. Just a few pictures below of what I got up to today. The rear guard was in ordinary condition with some previous welding work and was not fit to chrome so I had that powder coated in a finish that sort or resembles polished mild steel, I am happy with it for now at least. Frame and bits are powder coated gloss black and look tops. Putting all together is a bit of a puzzle, I should have taken better notice while I was dismantling. Yamaha seem to have a strange relationship between gromet's and bolt size and unlike Suzuki part books, Yamaha do not state the length of bolts, just a part number, but in the end I worked it out and I can finally see it coming together. I think now I have to wait till the chrome work comes back before I can do much more, that should be sometime next week. I am also waiting on the last parts needed for the crank rebuild, the crank pins. |

| Overall I am happy with it and it does look very nice but have to say it would not be good enough for a true concourse restoration, some parts still have minor pitting where not enough copper plating was done but as I said overall I am happy with it. |
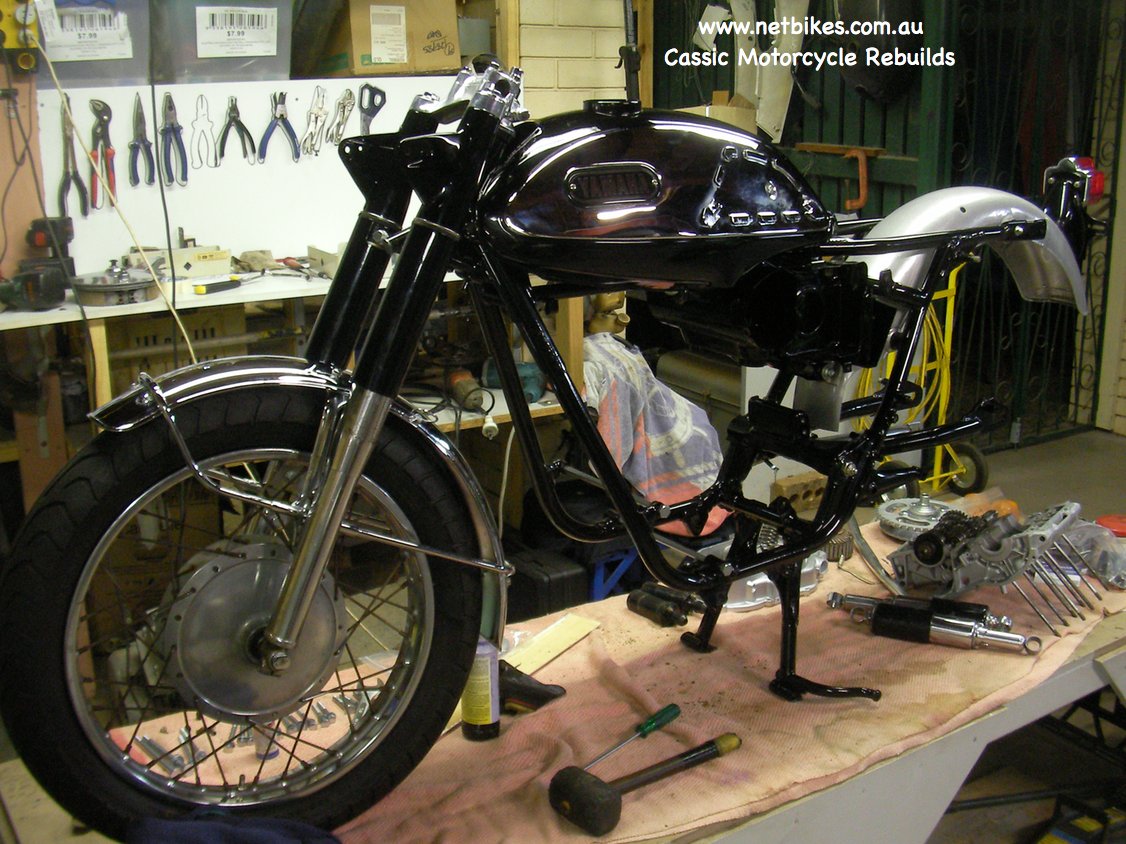
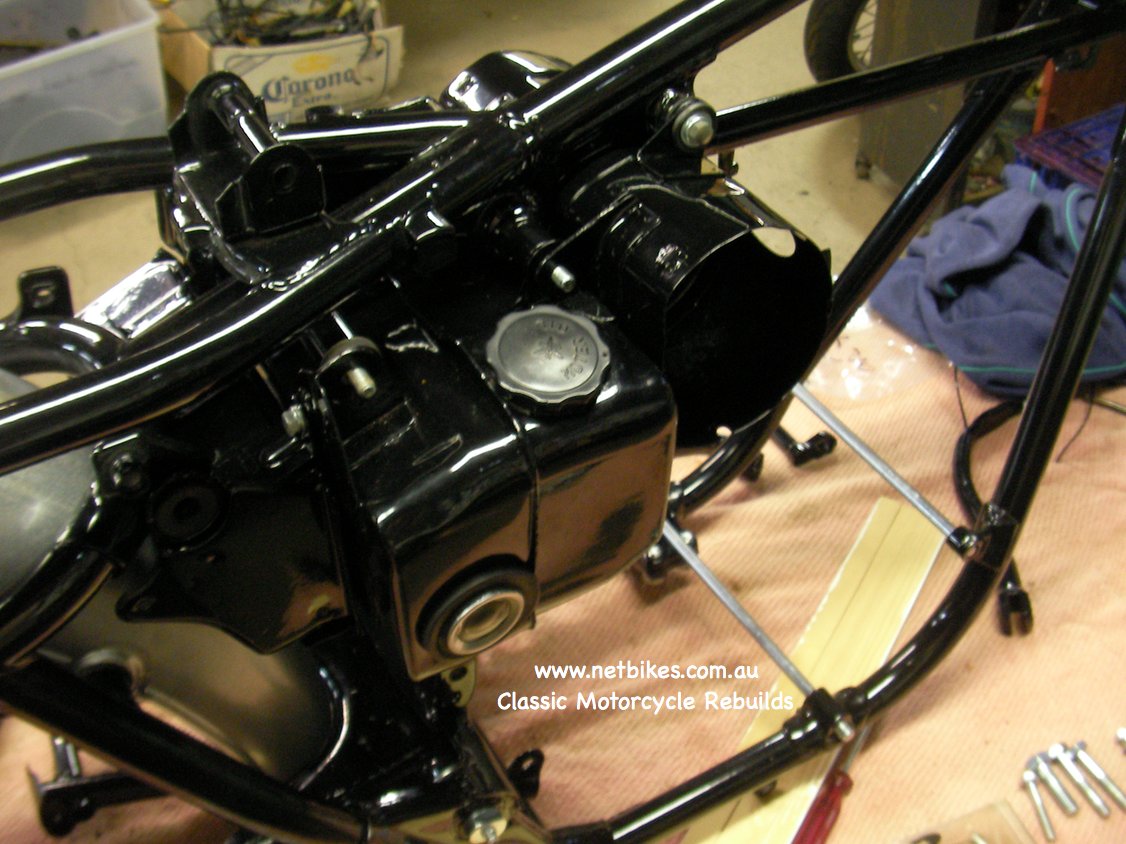
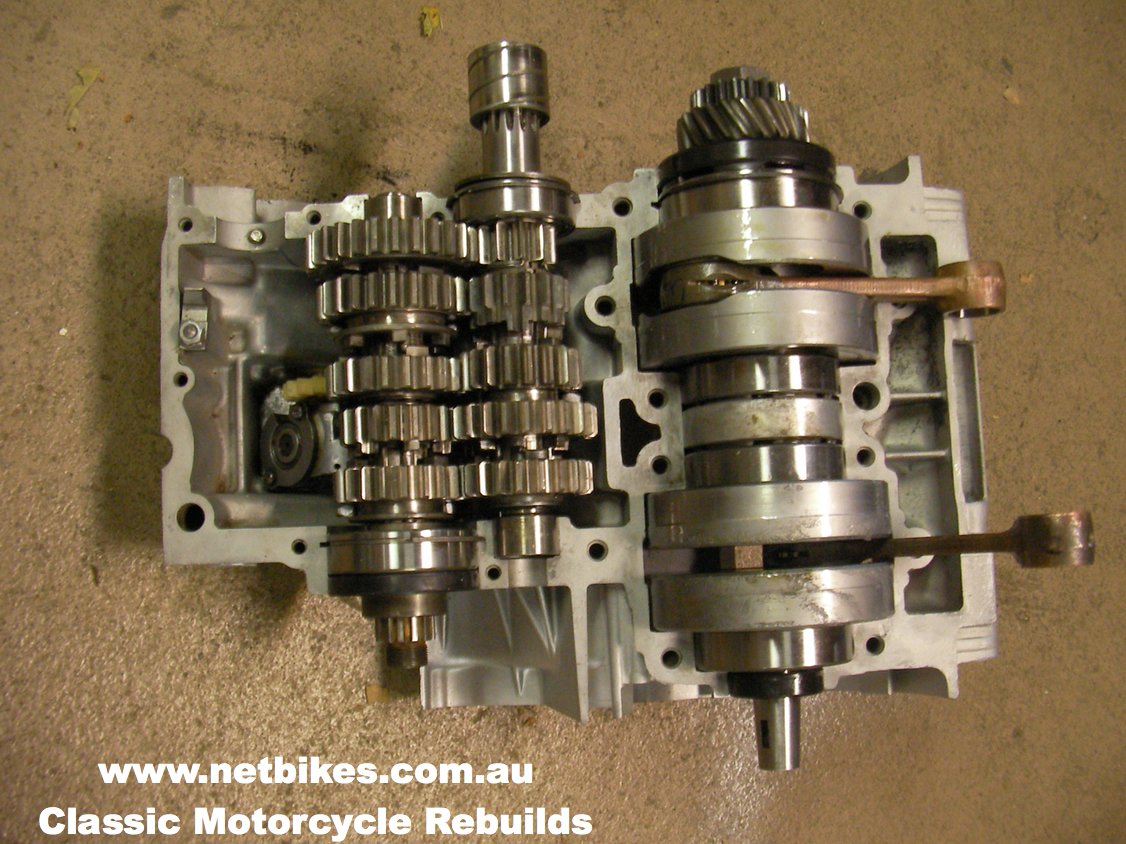
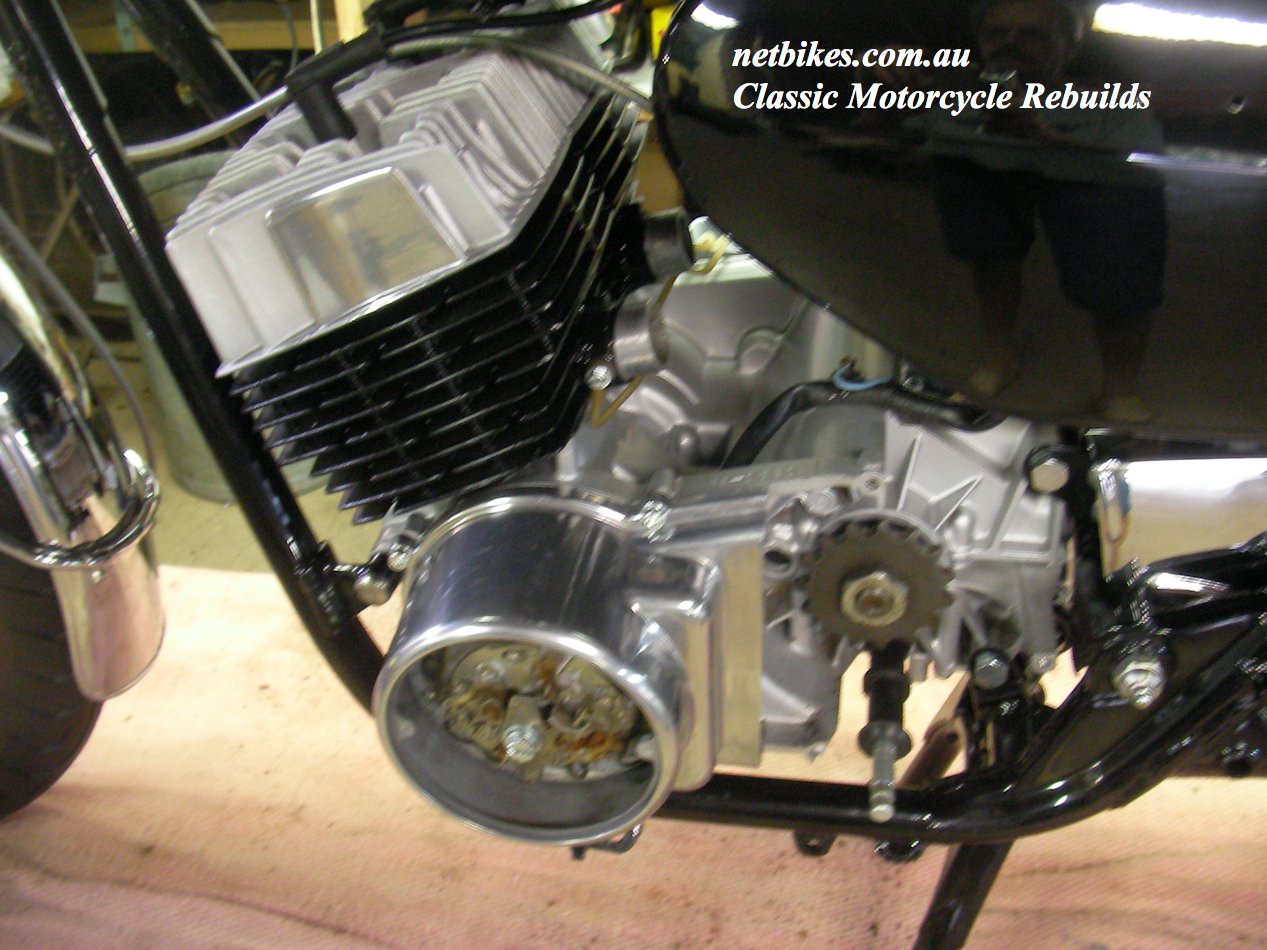
| Now all the crank parts I need, which was everything, arrived, and the crank is now back in the motor and the motor is now in the frame, fitting external parts is next on the agenda.
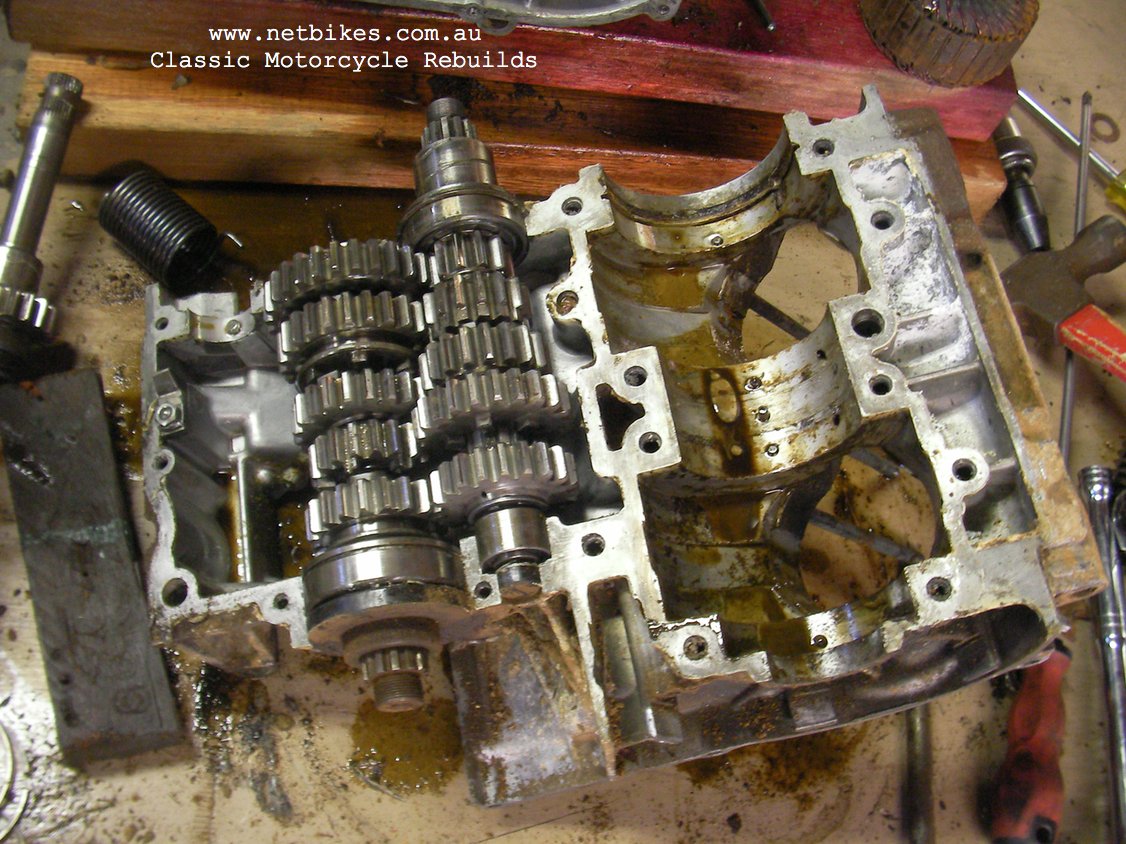
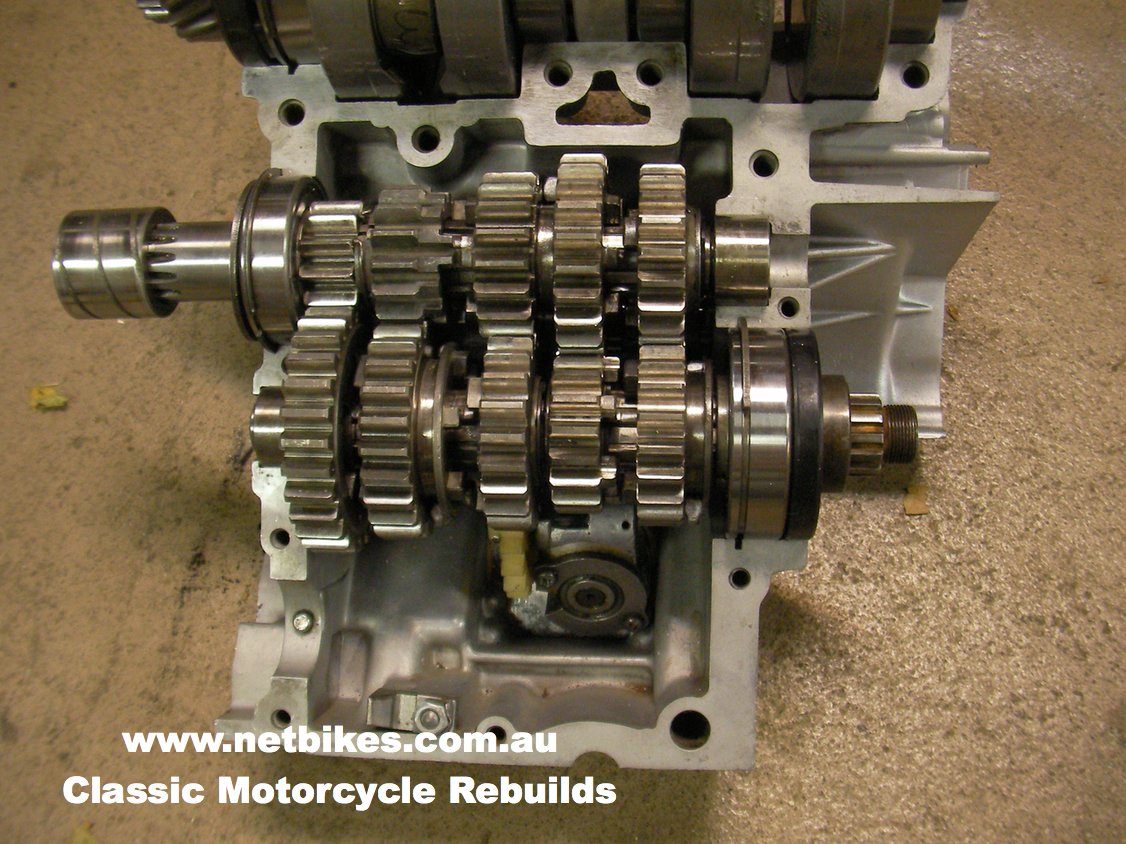
I also required 2nd gear as it had a broken tooth, it also arrived, the engine bottom end is complete with new rods, mains,big ends, crank pins and seals. The gear box also has new bearings and seals. The top end got new rings, piston pins and small end bearings. The pistons are still good and were reused. I still need to bead blast the heads.Till next update. |

| Below are a few random pictures I have taken over the past month or more, the rebuild has slowed down a bit but I am getting there. |
The motor basically complete and ready to start.
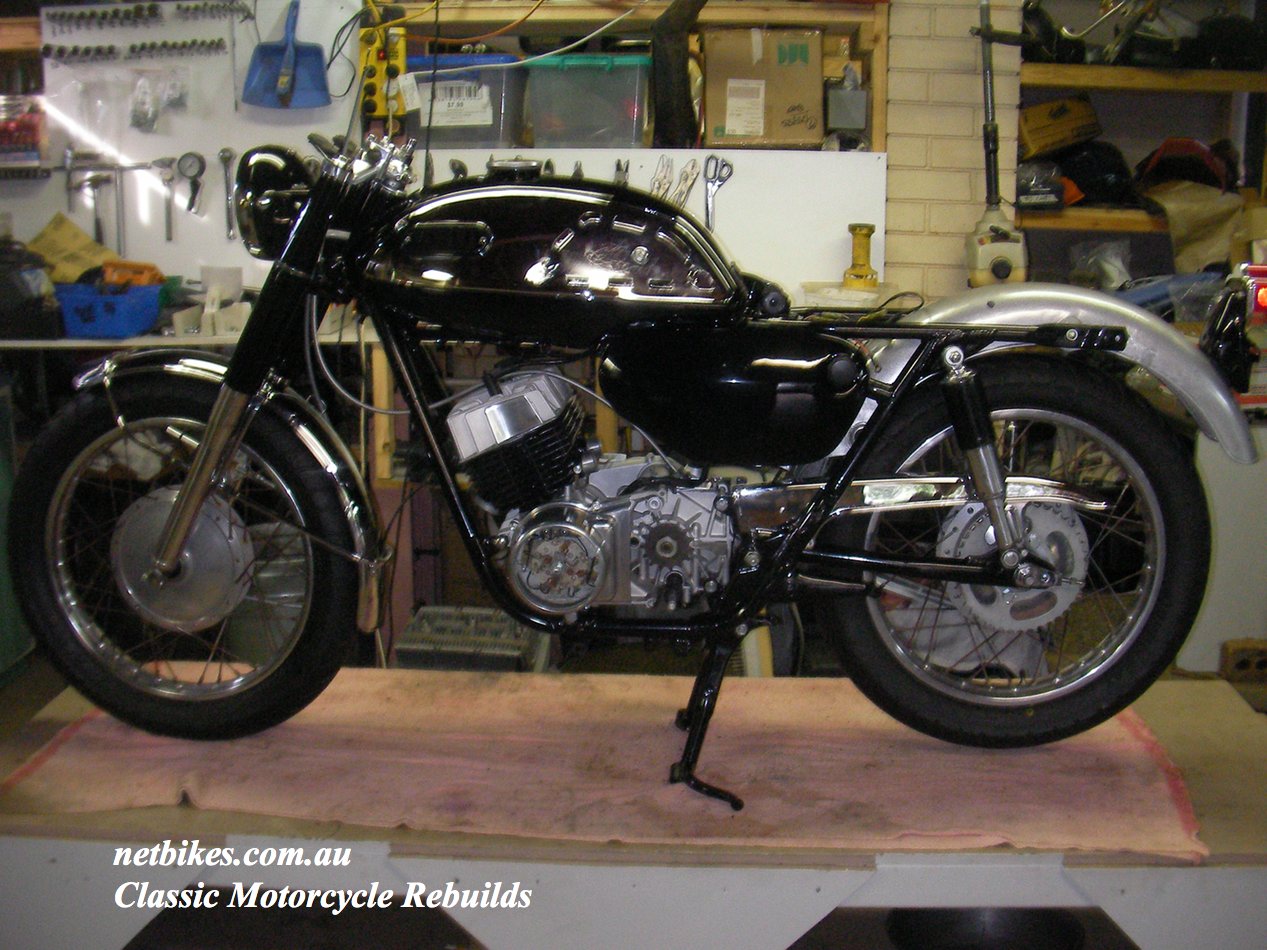
Pretty much all the wiring complete now.
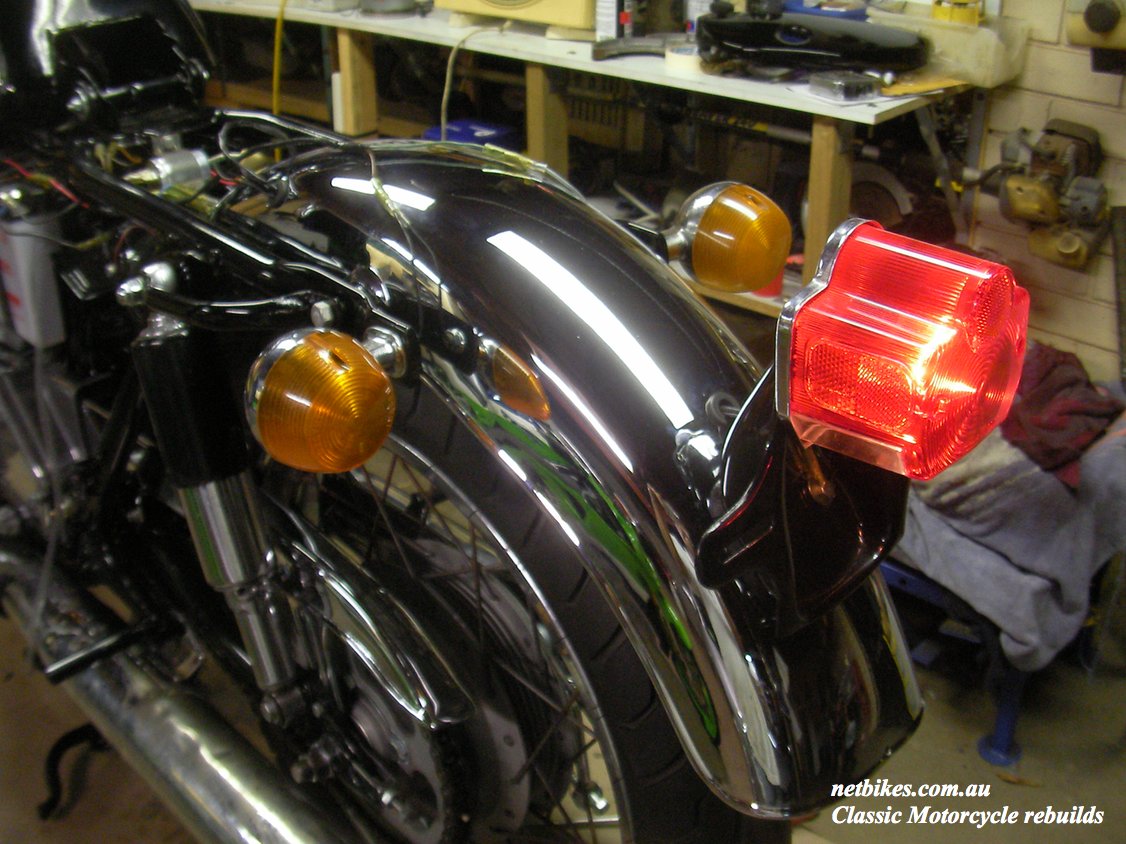

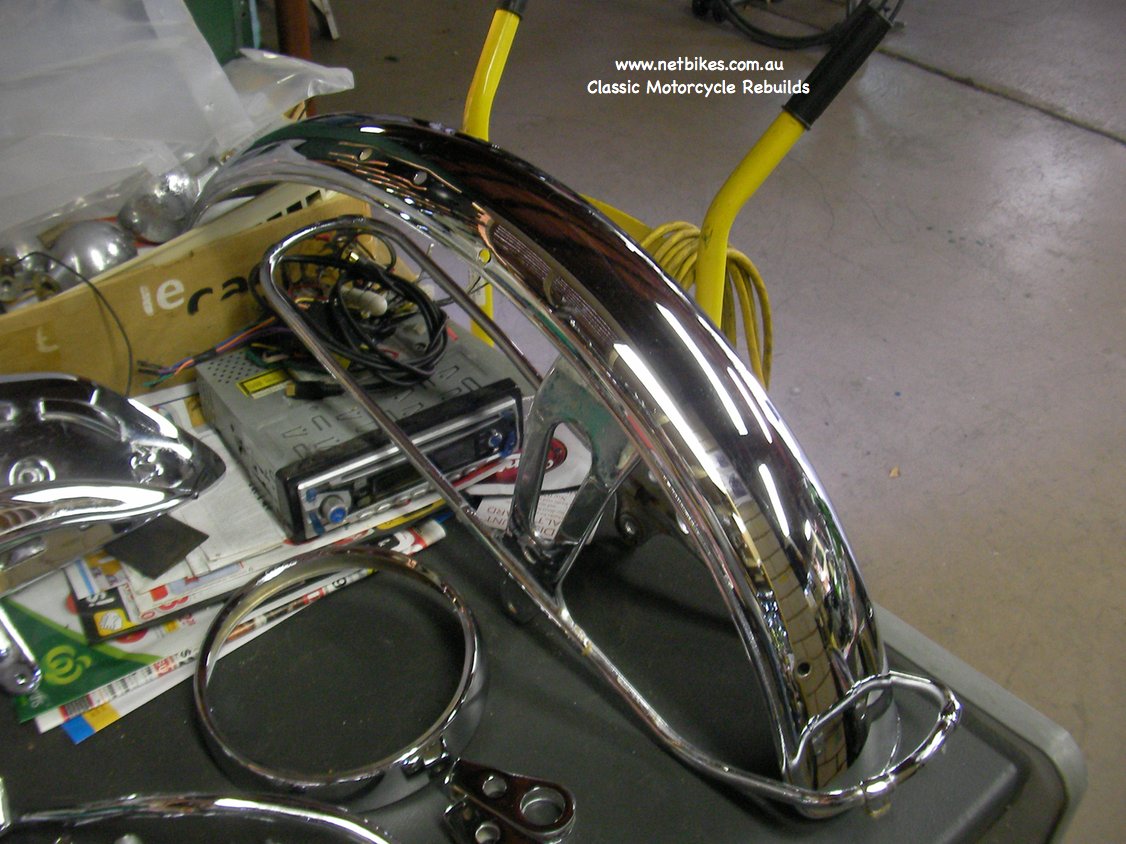
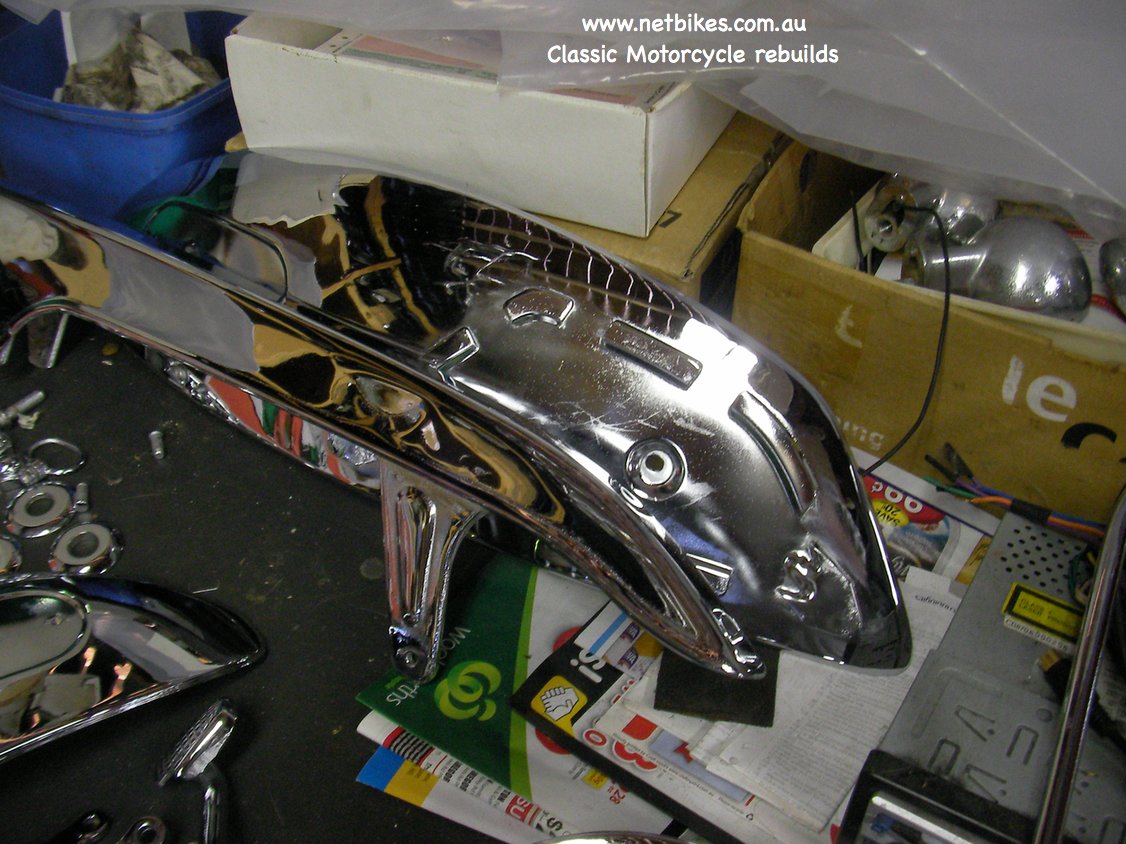
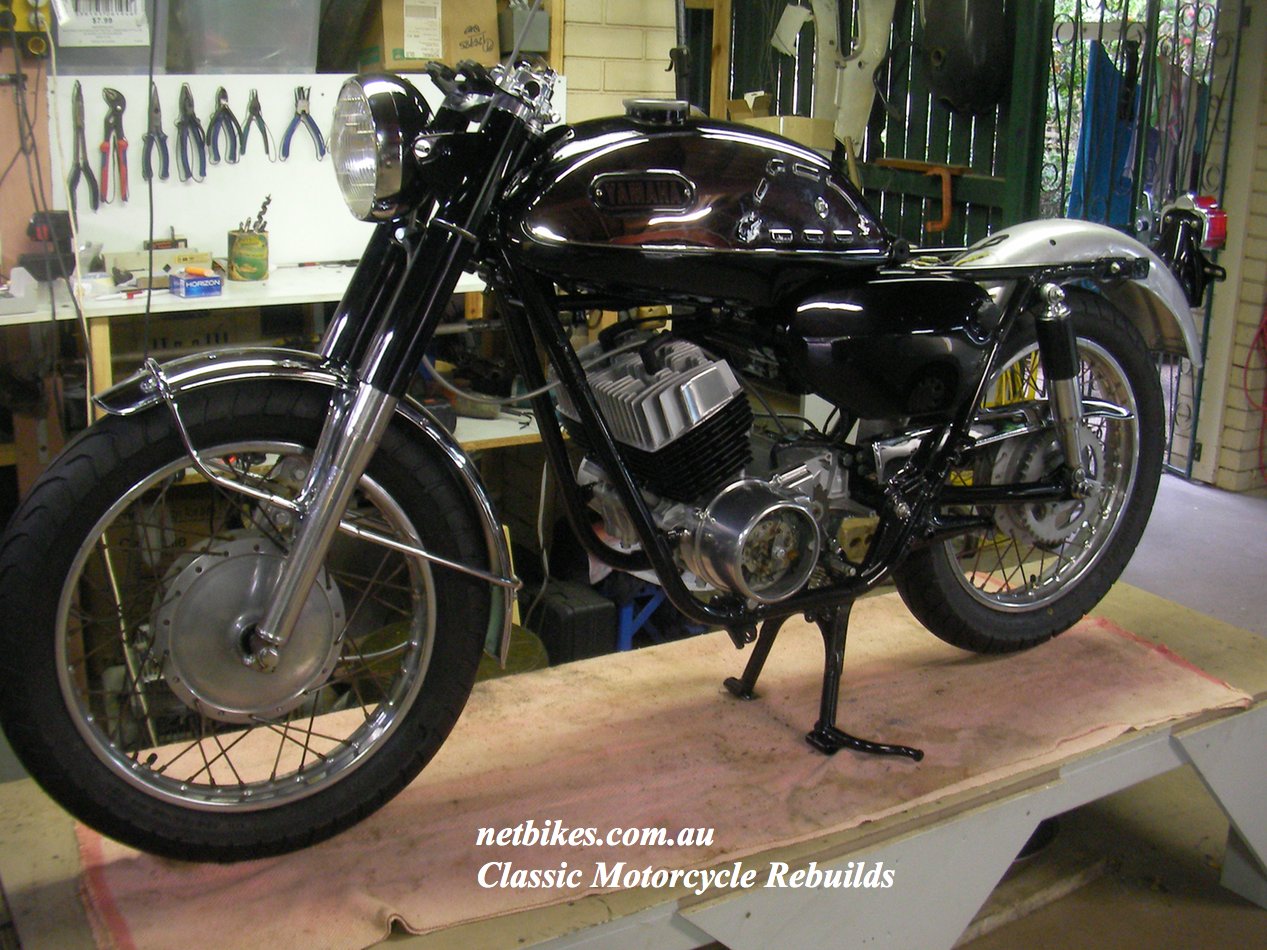
| A rear guard I took from another R3 I have and had chromed, looks sweet hey but it will go back to the red bike soon.
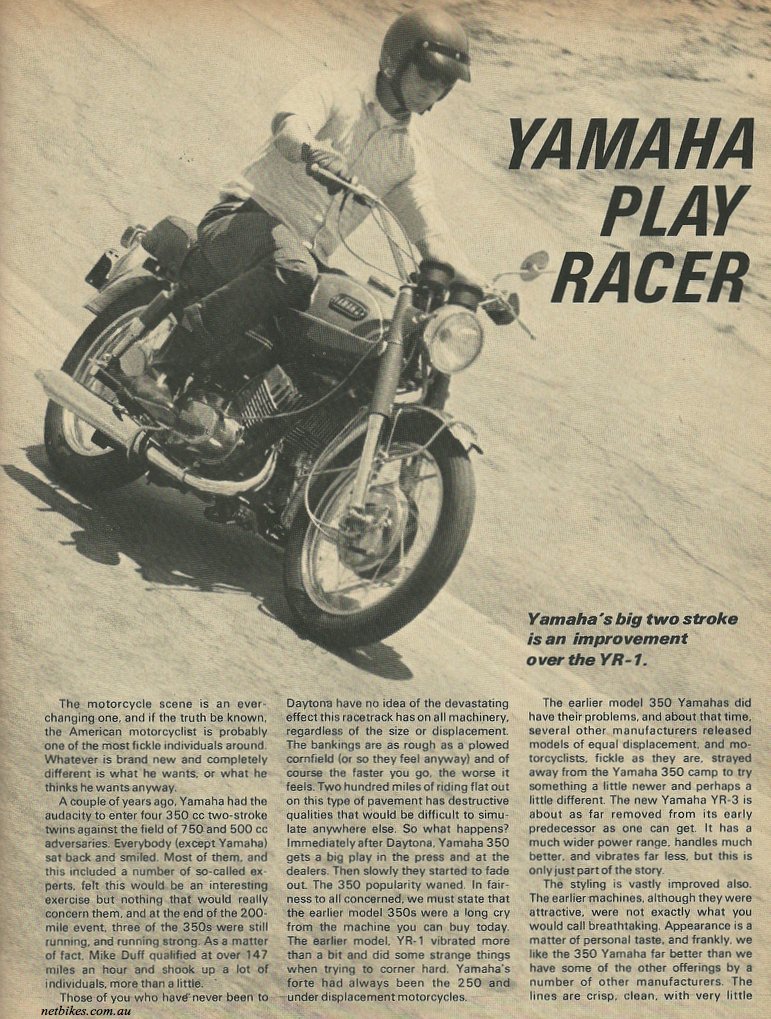
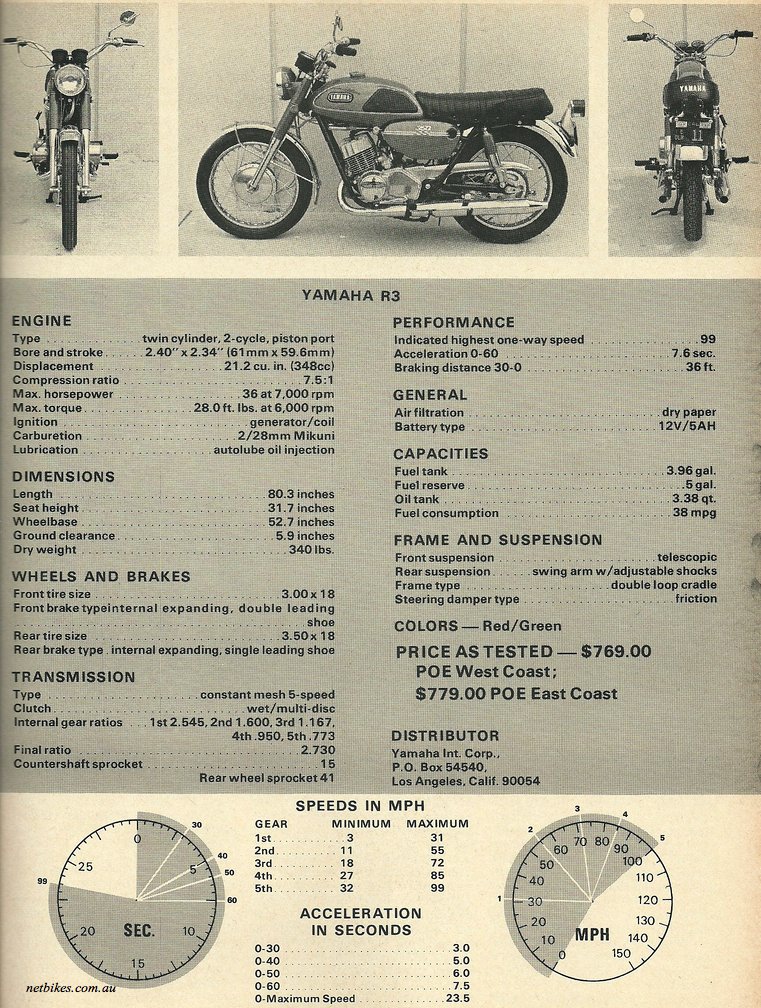
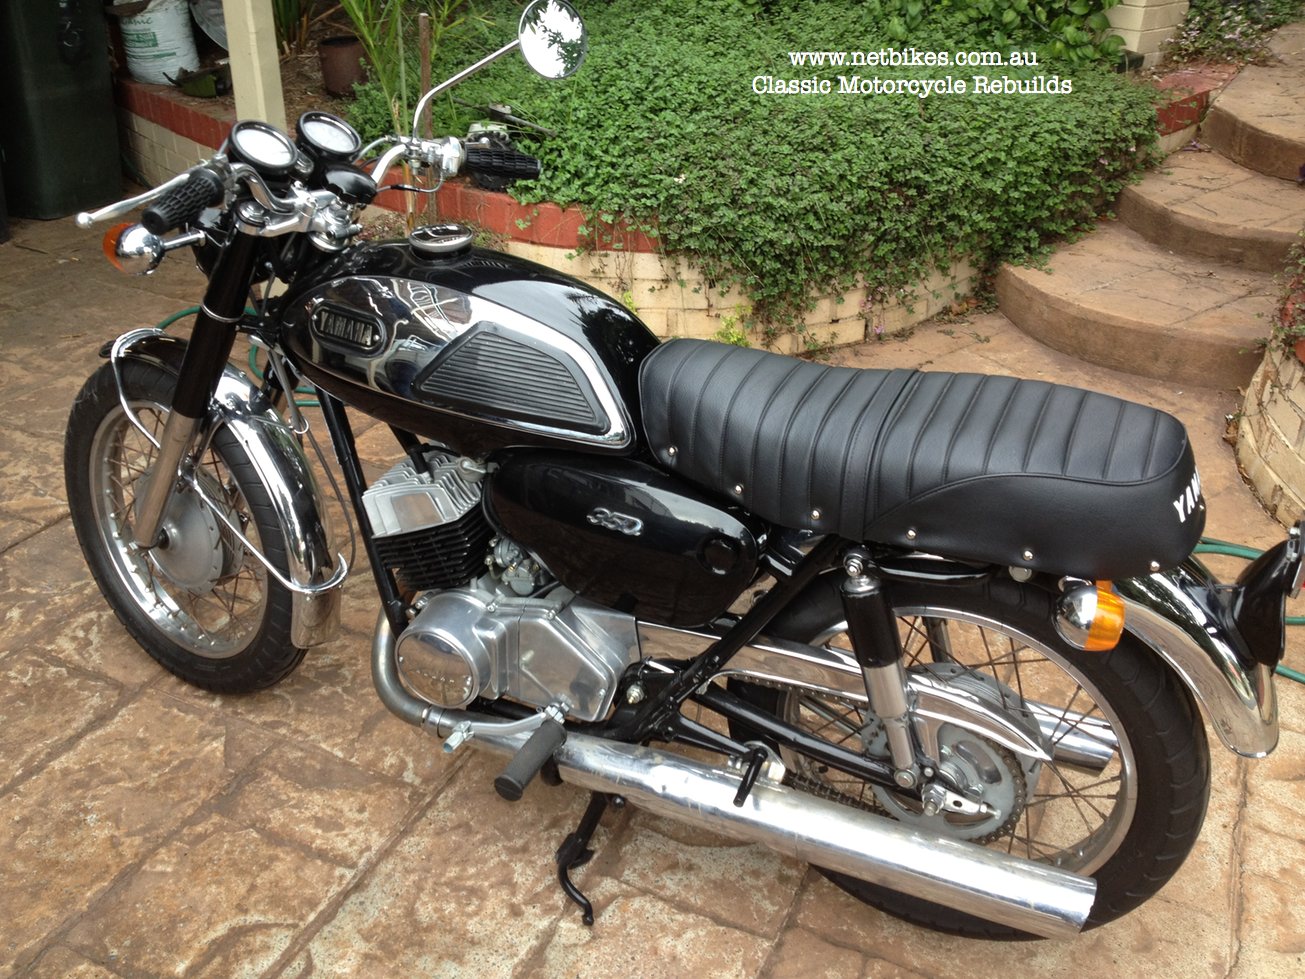
Well it is finally finished, at least for now, the seat was the big hold up, just got it back today and it looks great. Sometime in the future I would like to chrome the mufflers and fit allow rims. Random vintage article on the R3 motor below. |
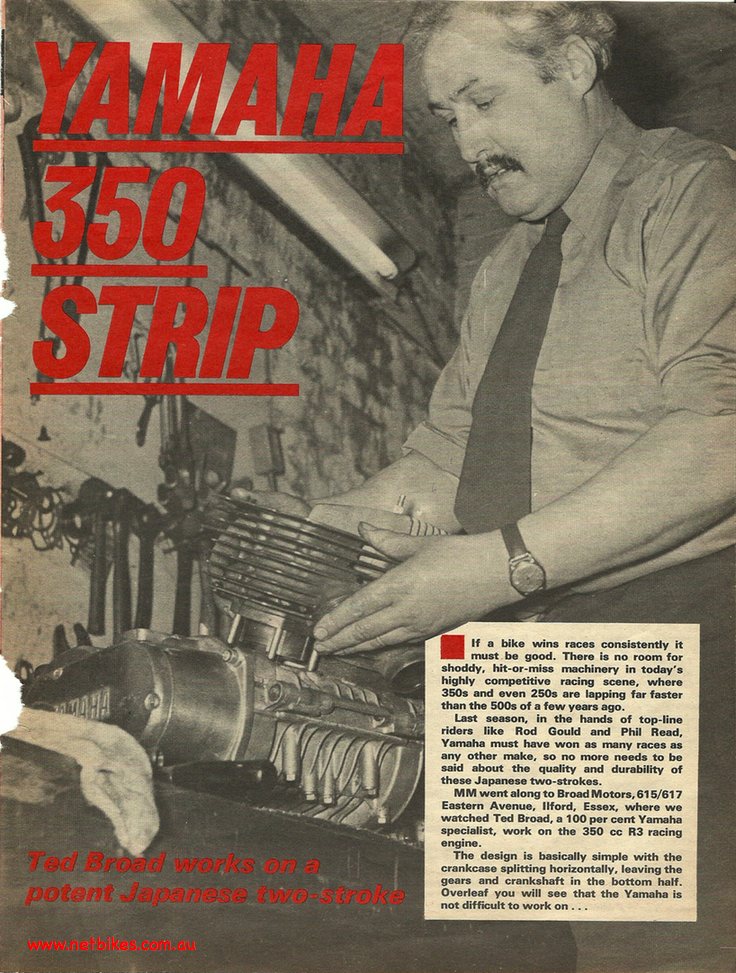
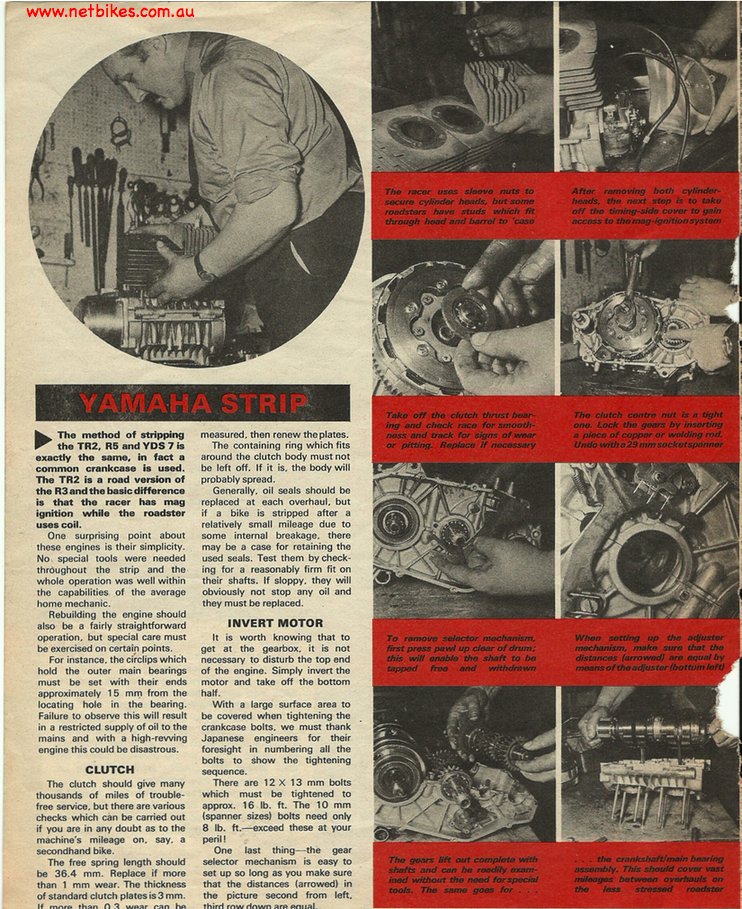
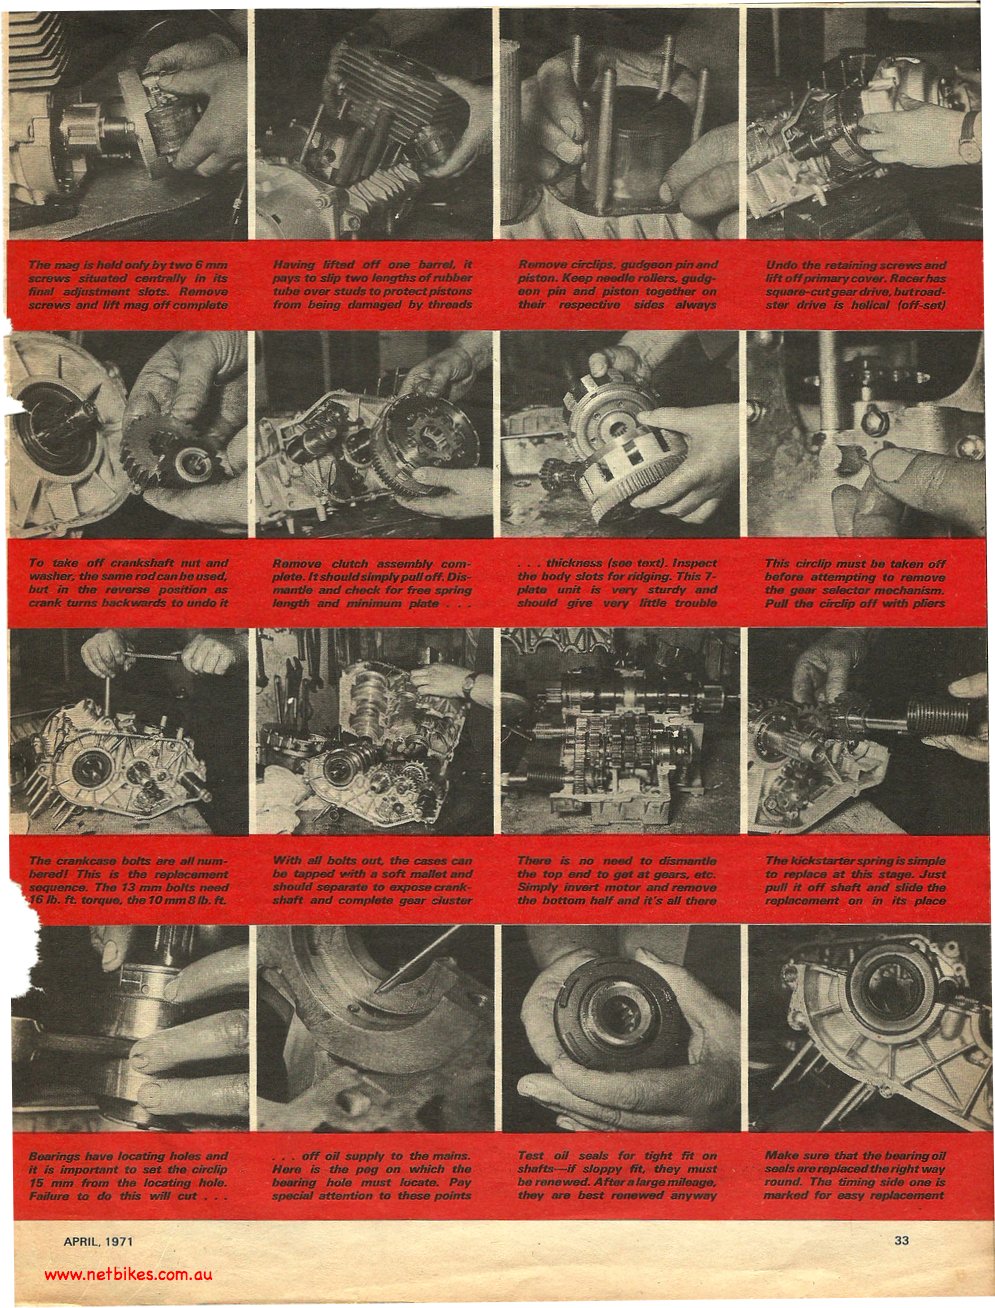
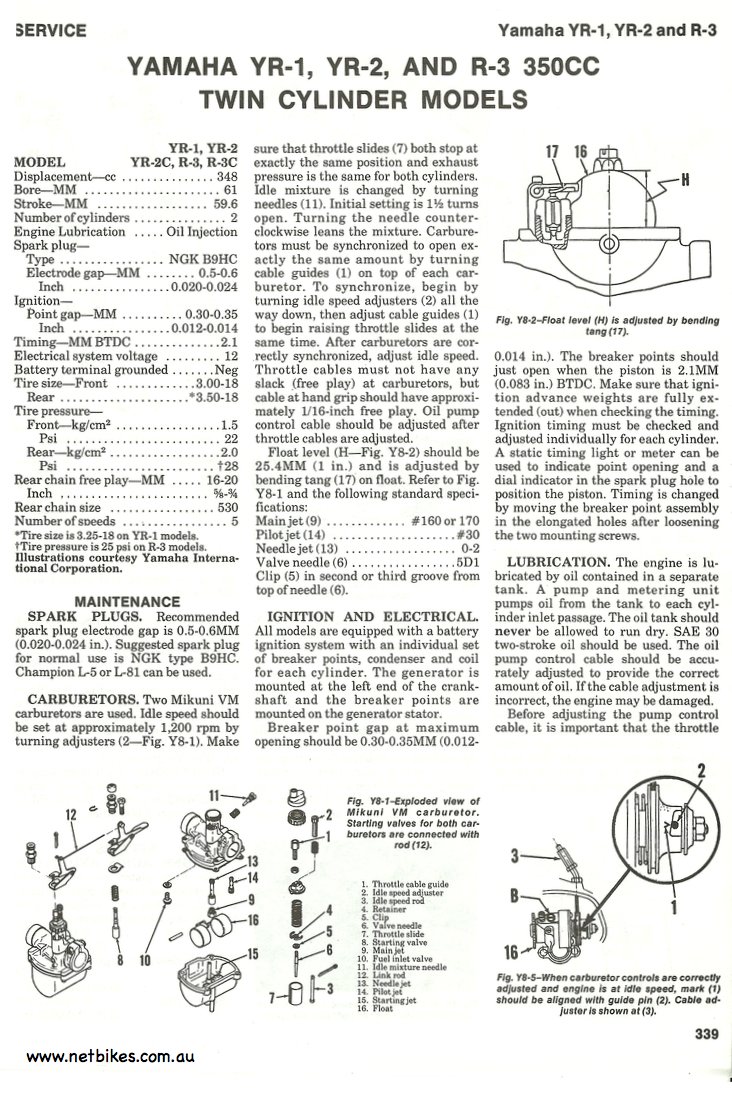
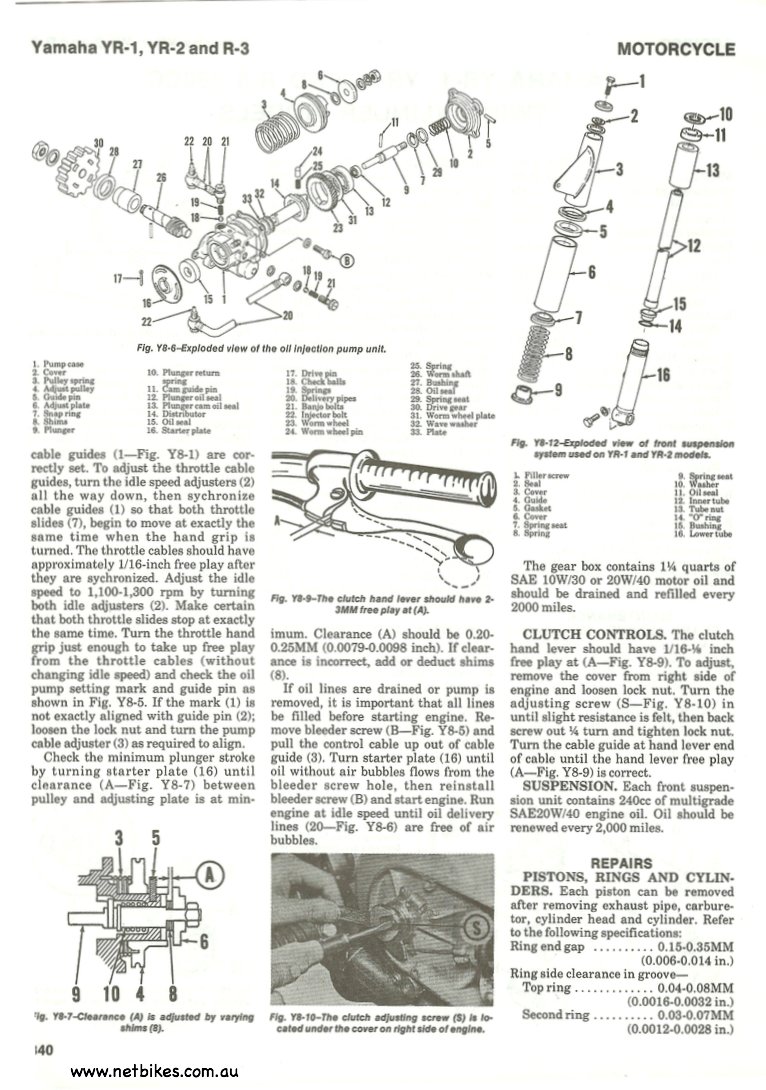
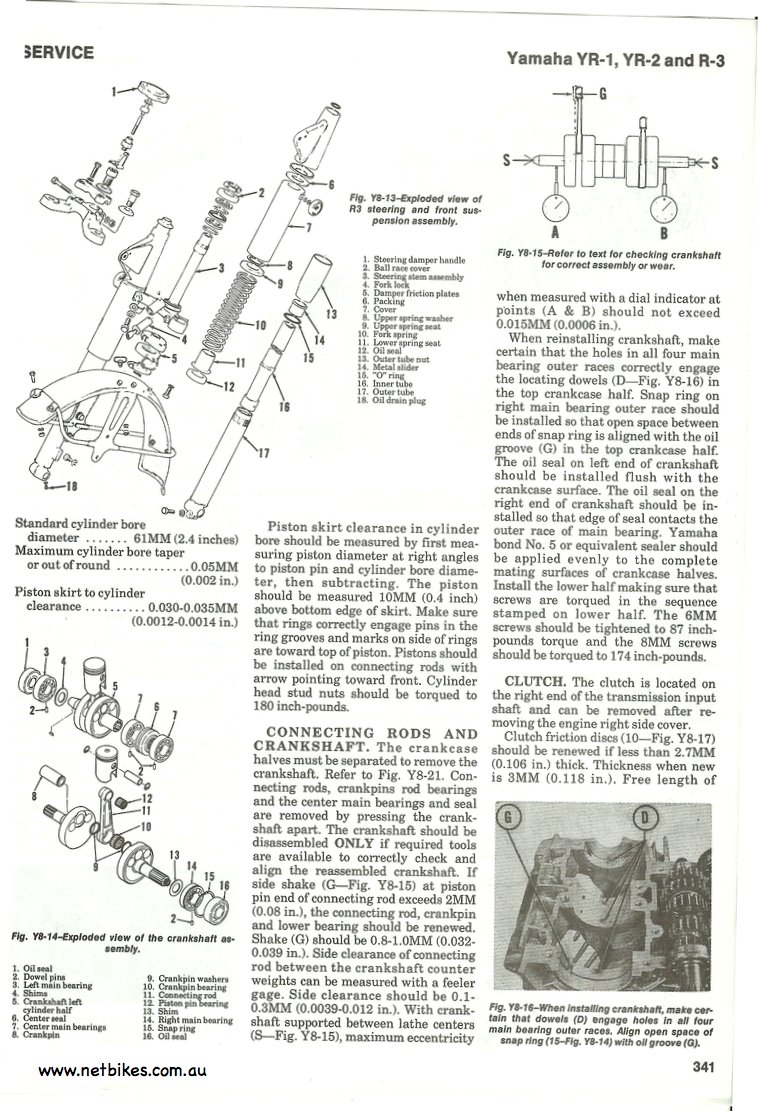
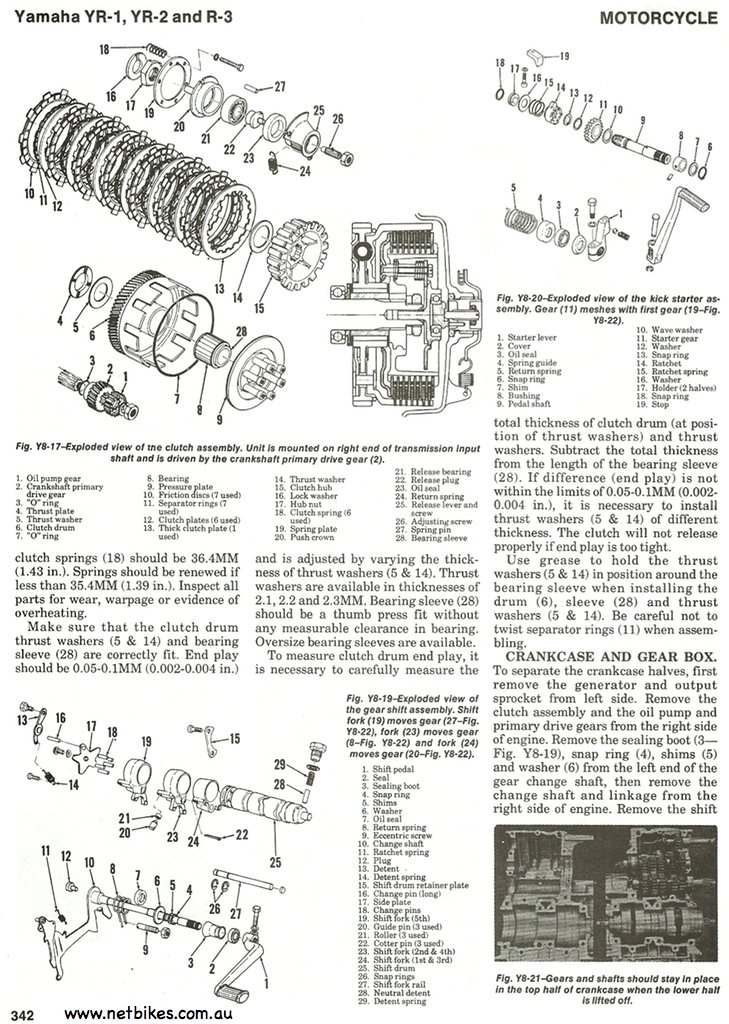
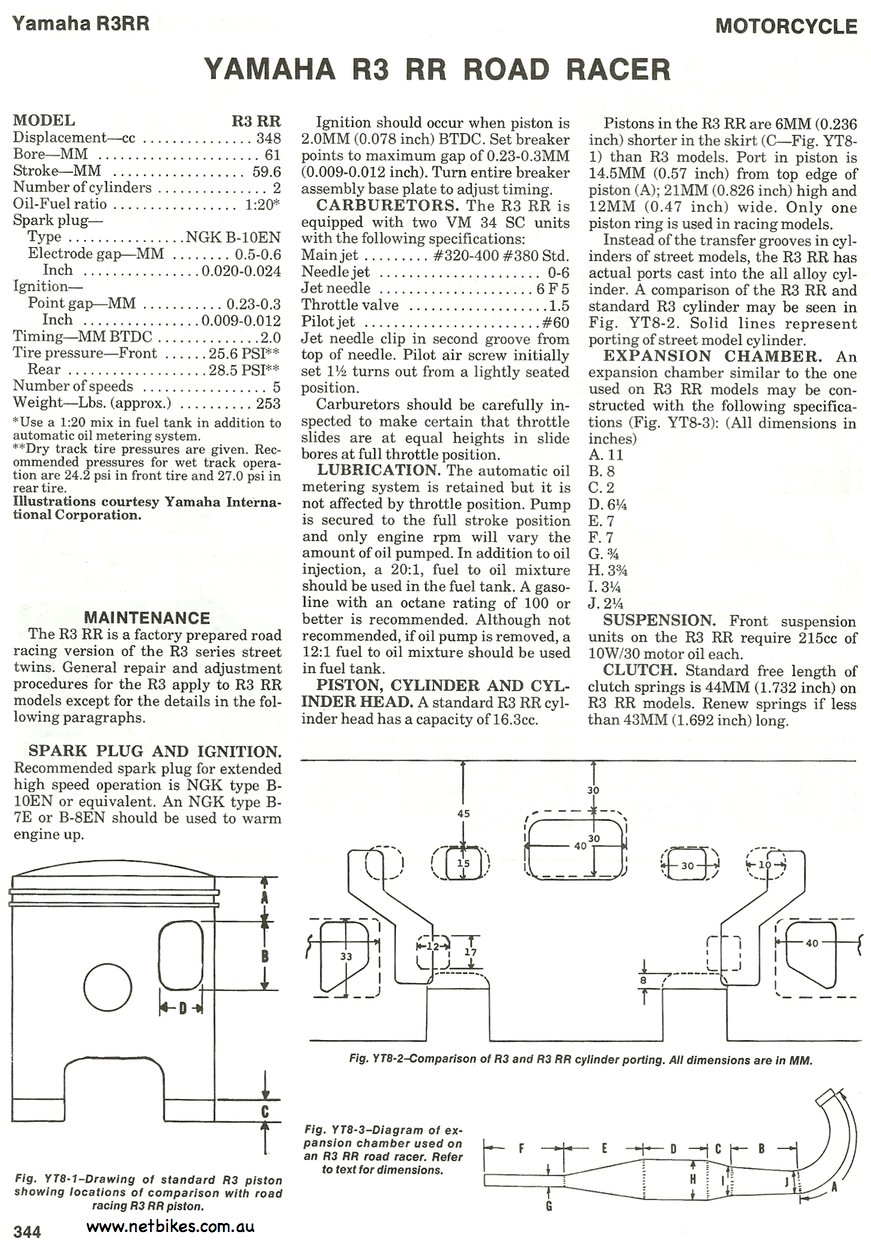
Yamaha R3 Race Tuning